OpsRamp provides you with the capability to build your integration using the Custom Integration framework.
Custom integration is configured between OpsRamp and your application if any third-party or other in-house applications are not present in the Available Integrations list.
You can utilize OpsRamp authentication details like key and secret, and access OpsRamp APIs.
Using Custom integration, multiple tenants can inherit properties of a parent integration automatically without using respective configuration.
Configure custom integration
Follow these steps to configure custom integration:
Click All Clients, select a client.
Click Setup > Account.
Select the Integrations tile.
The Installed Integrations screen is displayed, with all the installed applications. Click + ADD on the Installed Integrations page.
If you do not have any installed applications, you will be navigated to the Available Integrations page. The Available Integrations page displays all the available applications along with the newly created application with the version. Note: Search for the application using the search option available. Alternatively, use the All Categories option to search.
Click +ADD on the Custom tile.
Enter the following information:
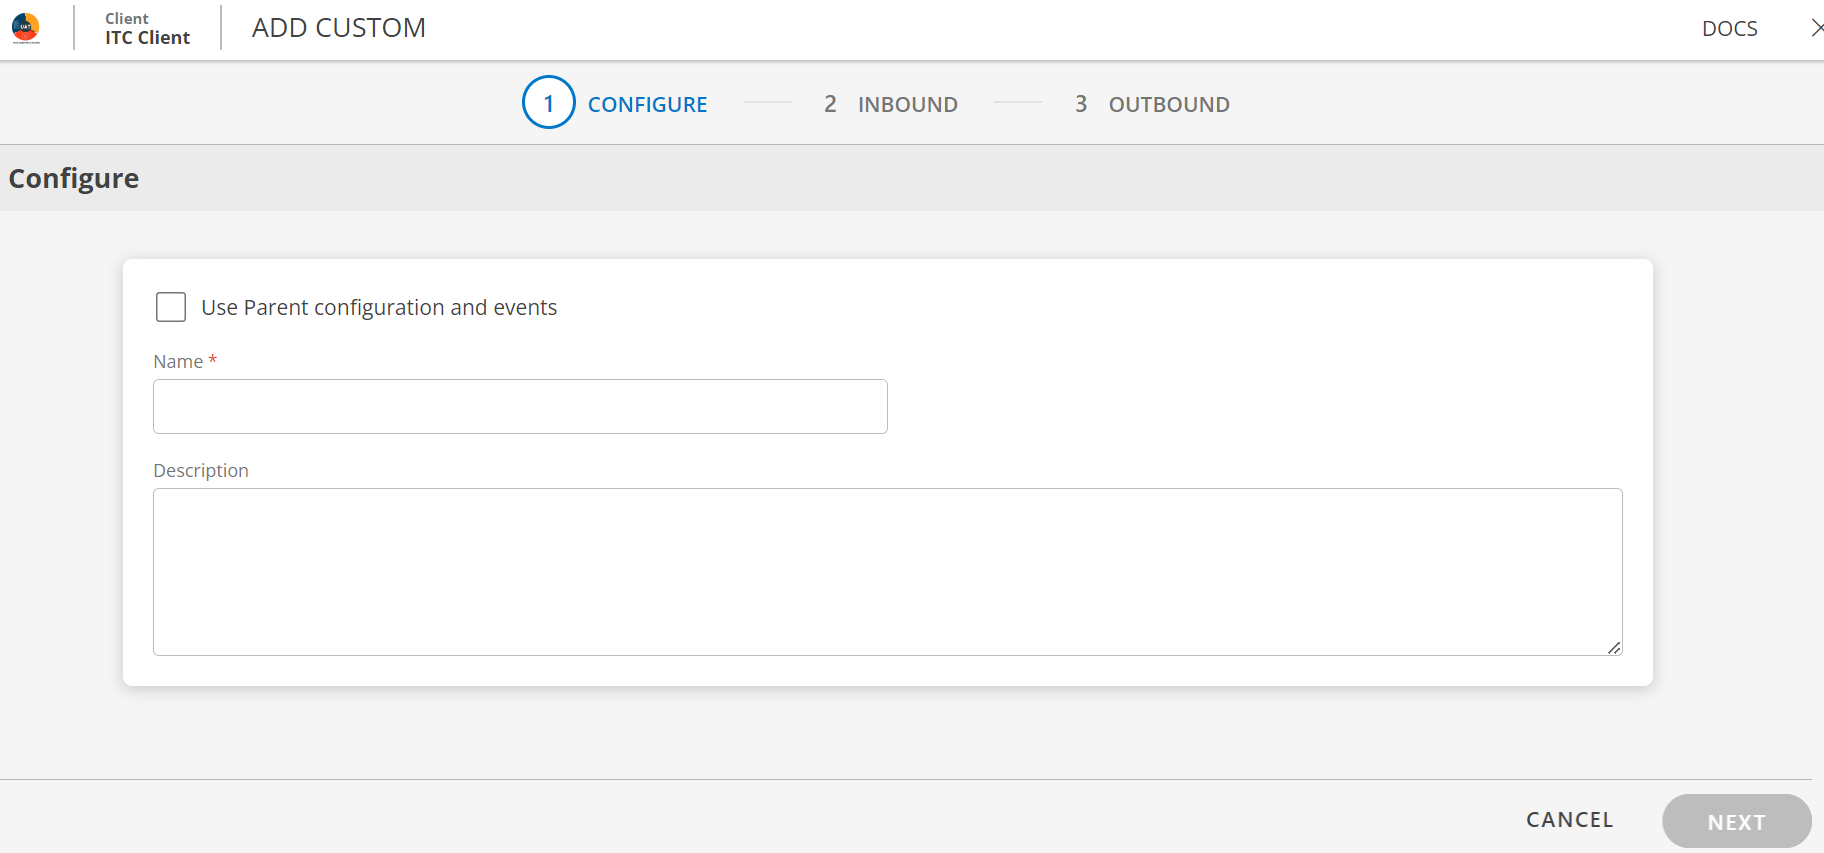
CONFIGURE
Field Name
Field Type
Description
Use Parent configuration and events
Checkbox
Select this option to inherit properties of a parent integration automatically. Select the Service Provider/Partner's custom integration from the drop-down list as applicable.
Name
String
Enter a unique name for the integration.
Description
String
Provide a description for the integration.
Note: If you select Use Parent configuration and events option, the Name and Description fields are disabled. These fields will be inherited along with other properties like configuration, events, inbound mapping attributes, outbound payload properties, outbound mapping attributes.
Click Next. The INBOUND screen is displayed.
Custom integration allows for bidirectional communication. Bidirectional integration includes both INBOUND (third-party application to OpsRamp) and OUTBOUND (OpsRamp to Third-party application) communication.
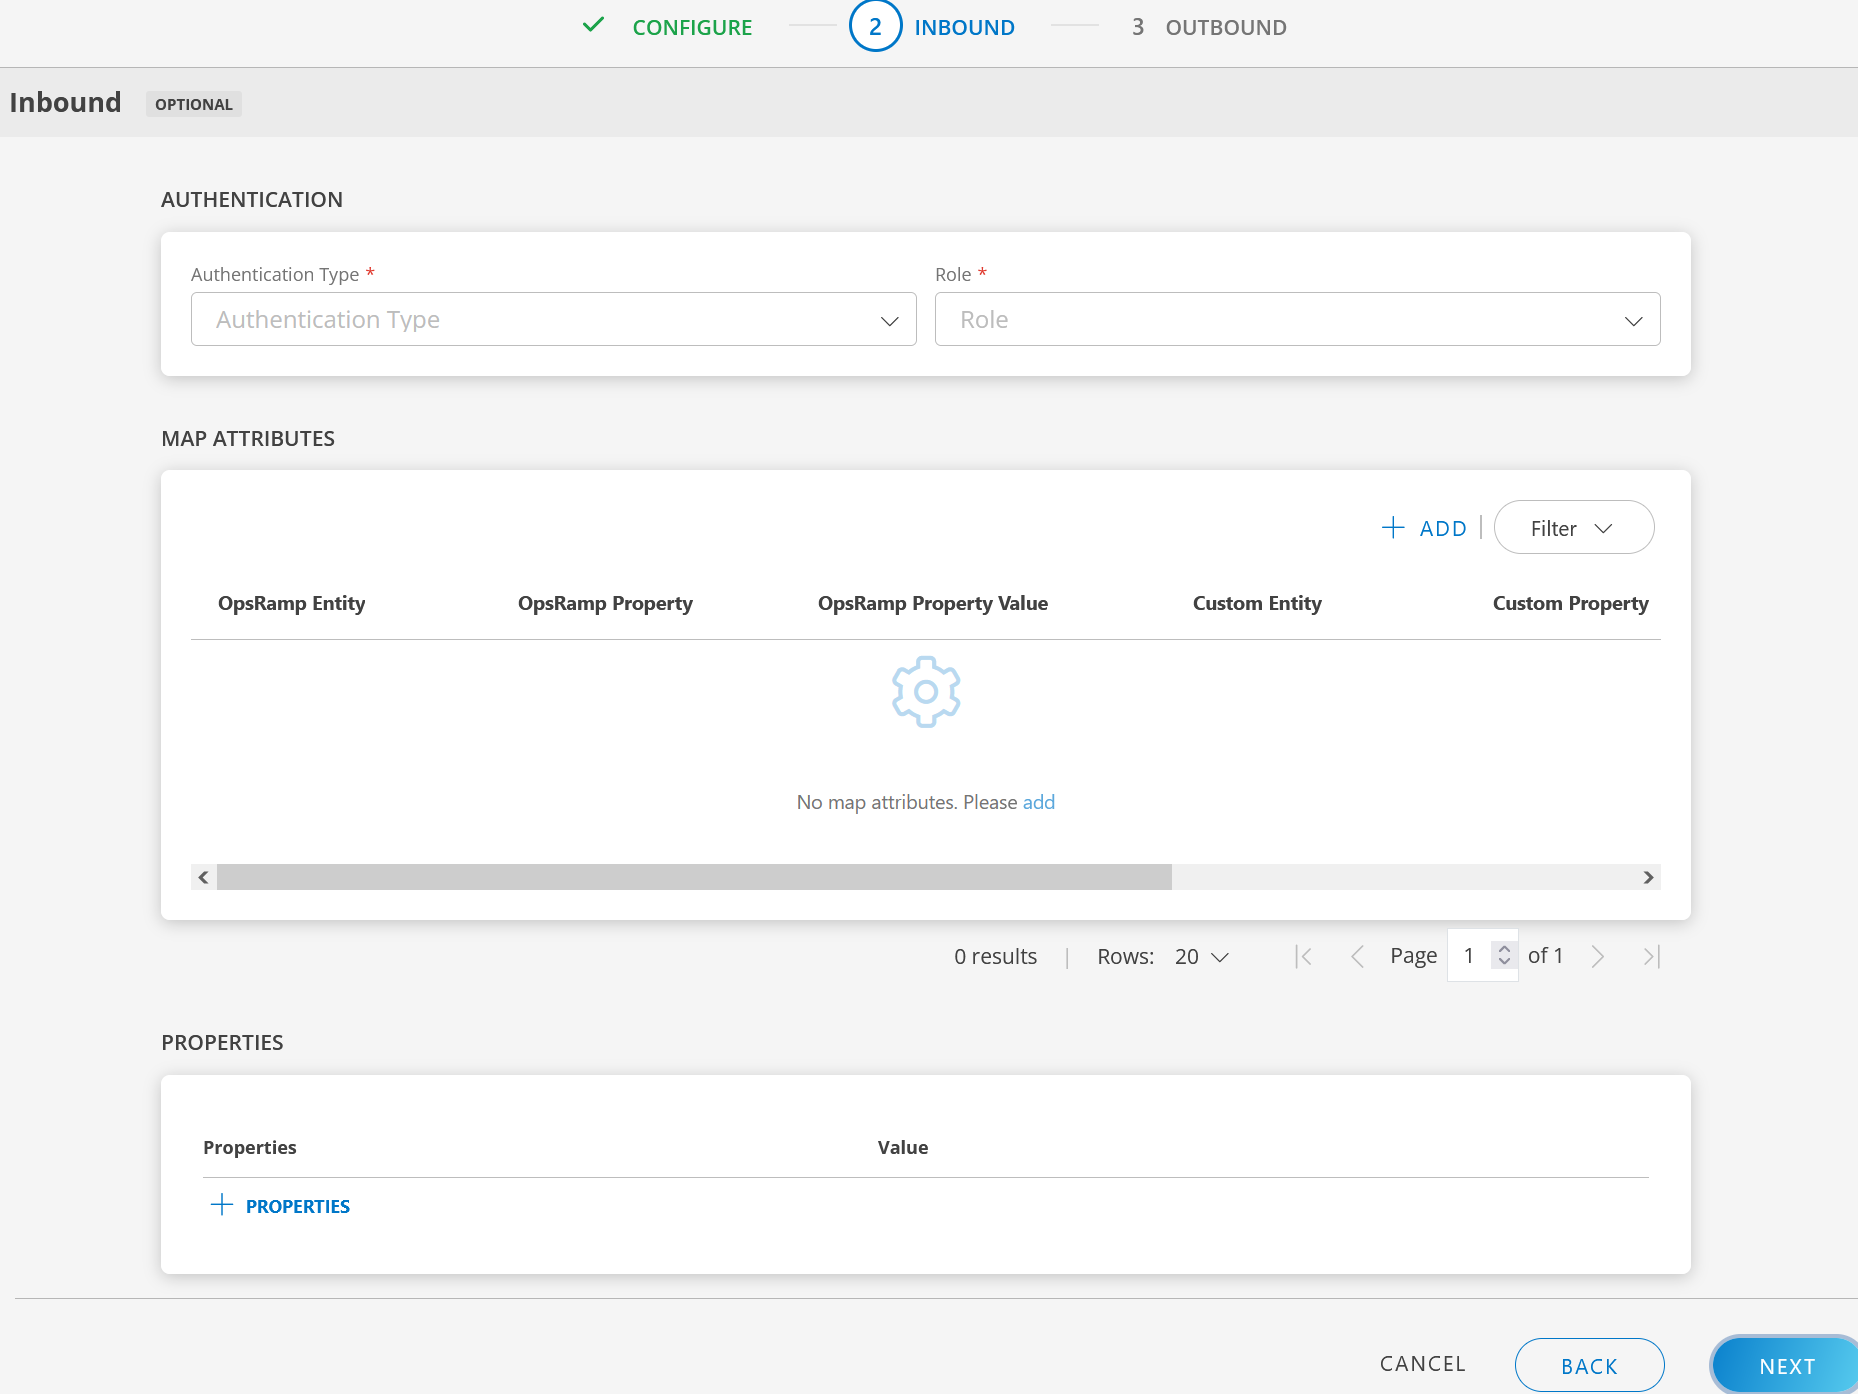
Configure INBOUND communication
AUTHENTICATION:
Field Name
Field Type
Description
Authentication Type
Dropdown
OpsRamp supports APIs with OAUTH2 for Custom. Select OAUTH2.
Role
Dropdown
Select the role of the user installing the integration. You can execute only those APIs that are associated with the selected role.
GENERATE KEY: Click to generate the Tenant ID, Key and Secret. Use the copy icon to make a note of the token. REVOKE ACCESS TOKEN: Click to revoke access token. This option is displayed only for OAUTH2 authentication type.
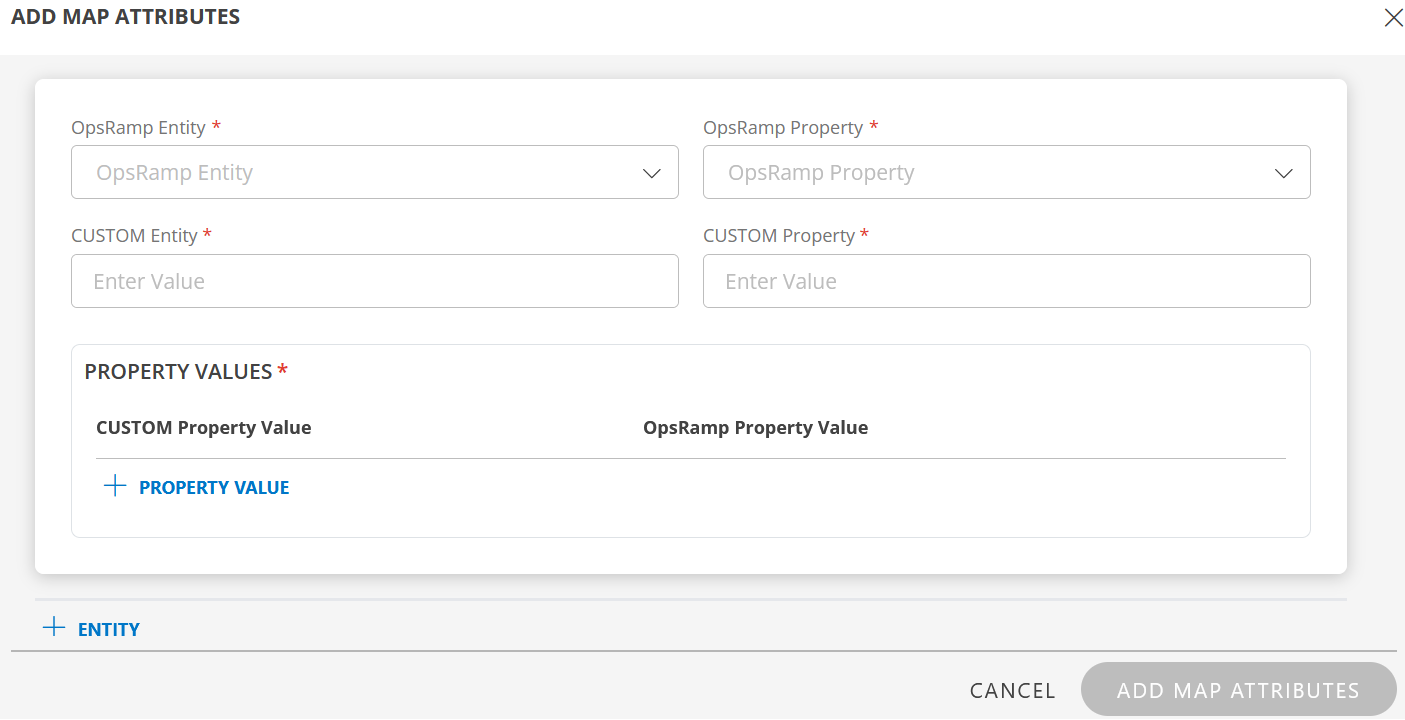
MAP ATTRIBUTES: Map the tenant entity attributes with OpsRamp entity. Click +ADD and enter the following information in the ADD MAP ATTRIBUTES window:
Field Name
Field Type
Description
OpsRamp Entity
Dropdown
Select OpsRamp entity from the dropdown.
OpsRamp Property
Dropdown
Select OpsRamp property from the dropdown. It will change based on entity selection.
CUSTOM Entity
String
Enter the Custom Entity in the box.
CUSTOM Property
String
Enter the Custom Property in the box.
PROPERTY VALUES: Click +PROPERTY VALUE. Enter the following information and click SAVE: Note: This section is displayed based on the OpsRamp Entity and OpsRamp Property selected.
Field Name
Field Type
Description
CUSTOM Property Value
String
Enter custom property value in the box.
OpsRamp Property Value
Dropdown
Select a value from the dropdown. Based on the OpsRamp Property selected, the options in this field vary.
Click ADD MAP ATTRIBUTES. The mapped information is displayed in the MAP ATTRIBUTES section.
Click +ADD to add additional map attributes.
Use the three dots menu to edit or remove the map attributes.
Use Filter to filter the map attributes.
PROPERTIES: Click +PROPERTIES and enter the following information:
Field Name
Field Type
Description
Properties
String
Enter a value.
Value
String
Enter a value.
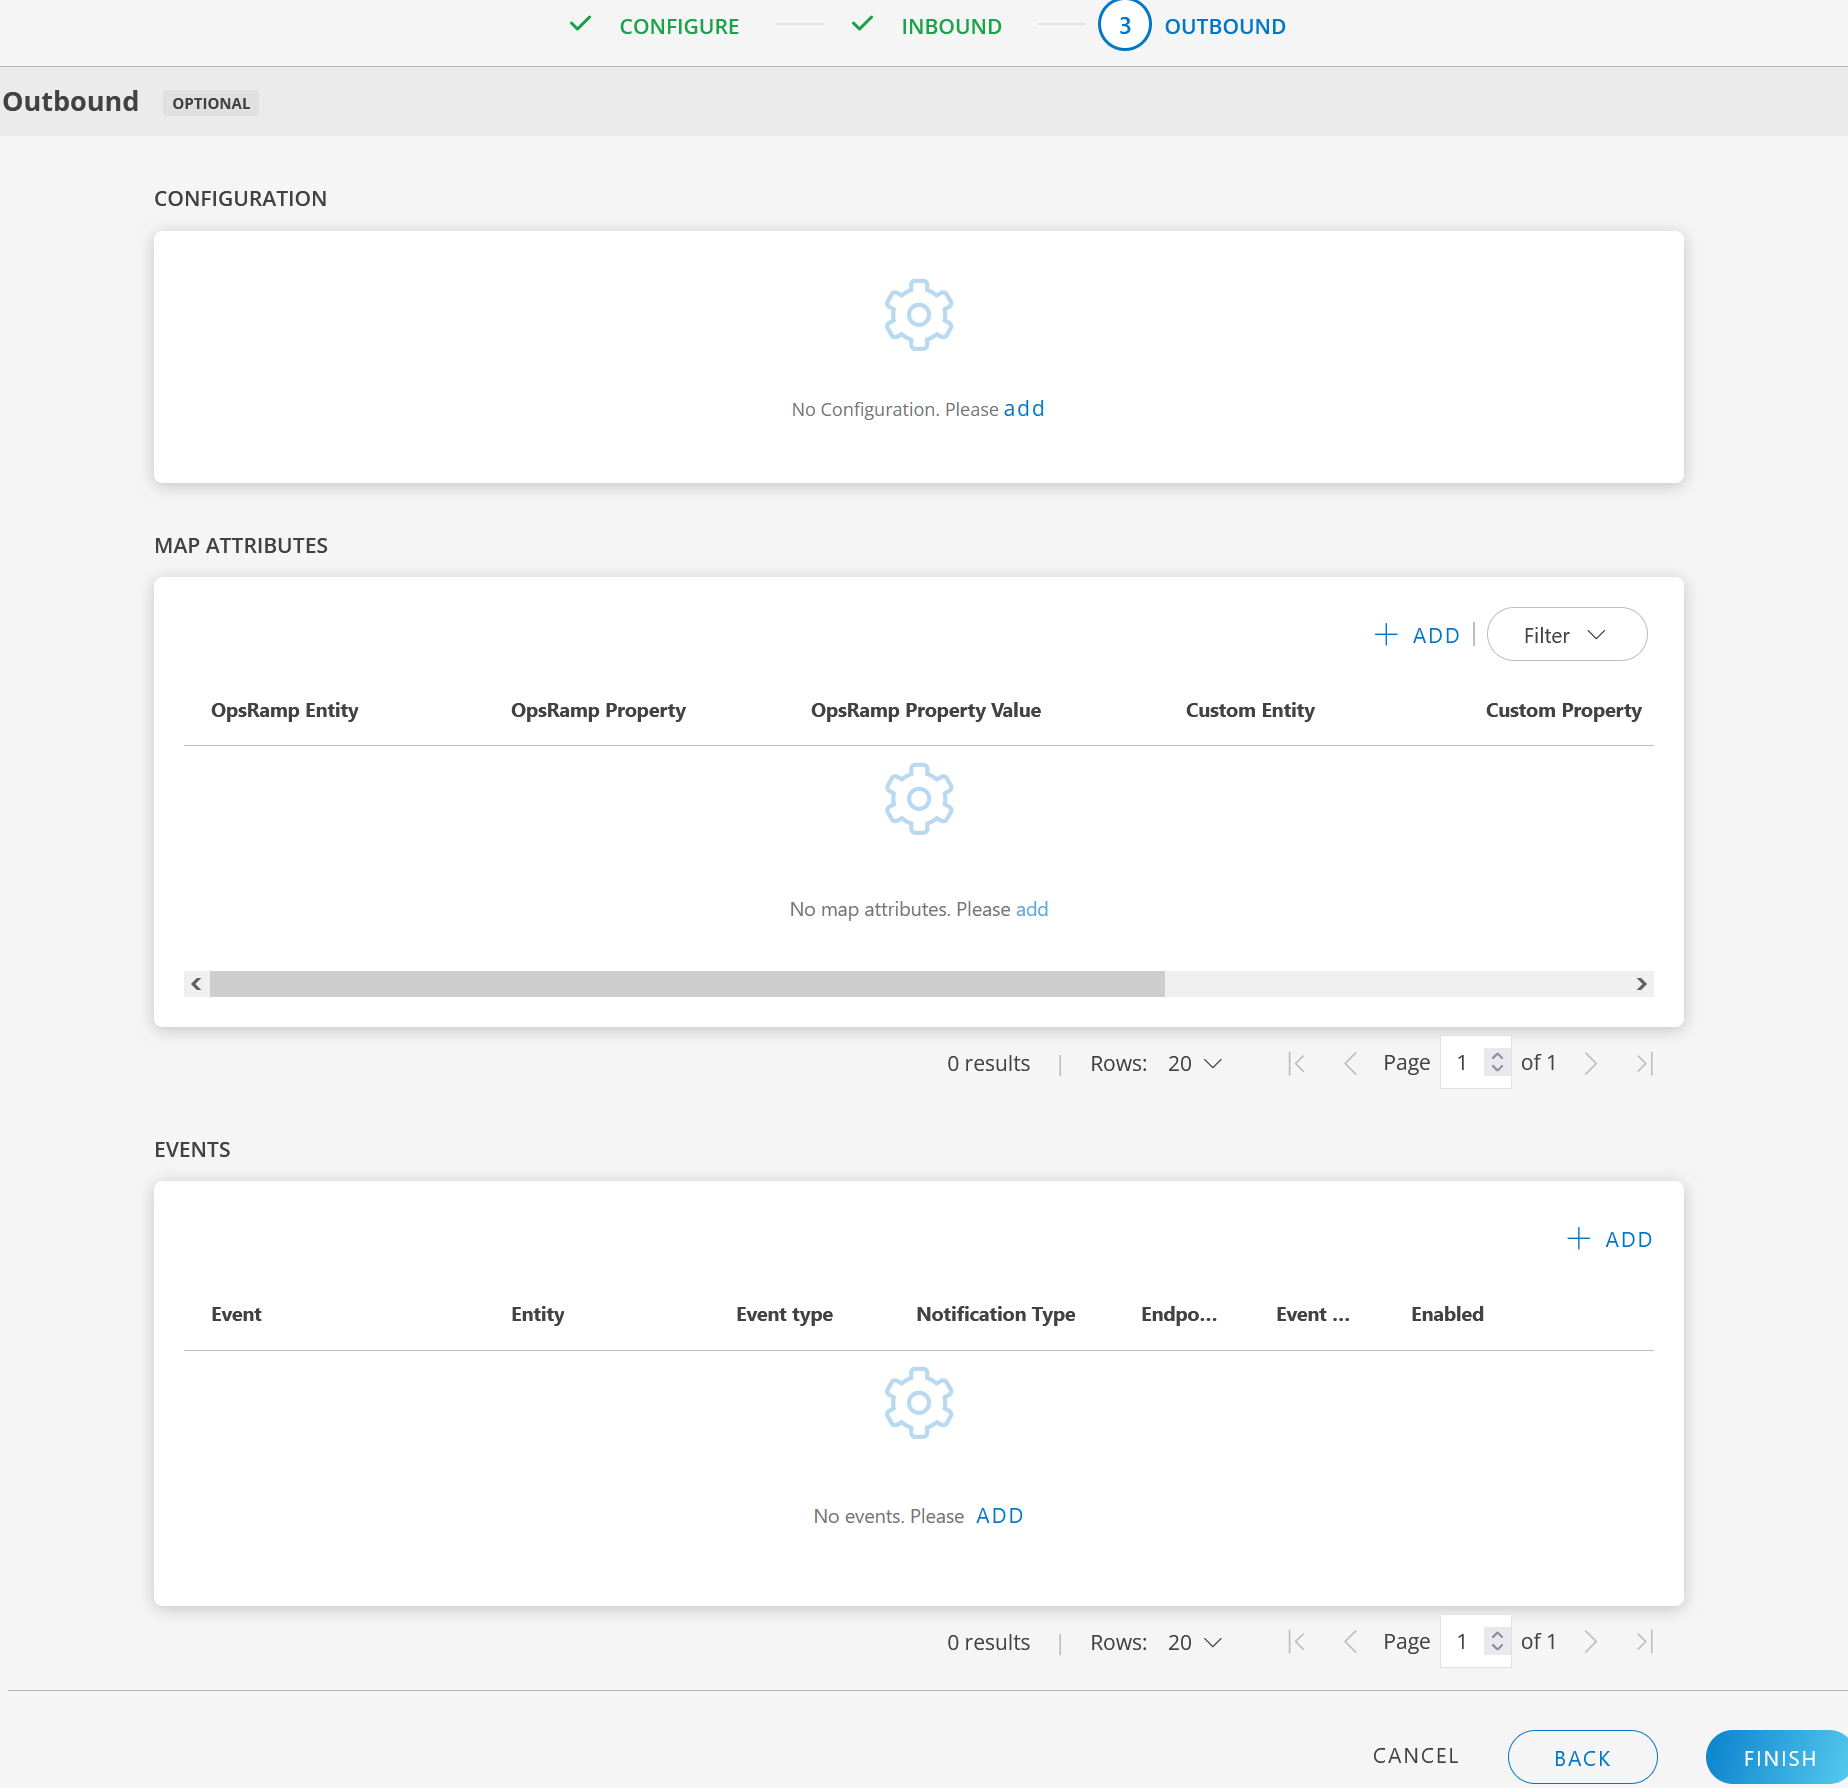
Click Next. The OUTBOUND screen is displayed.
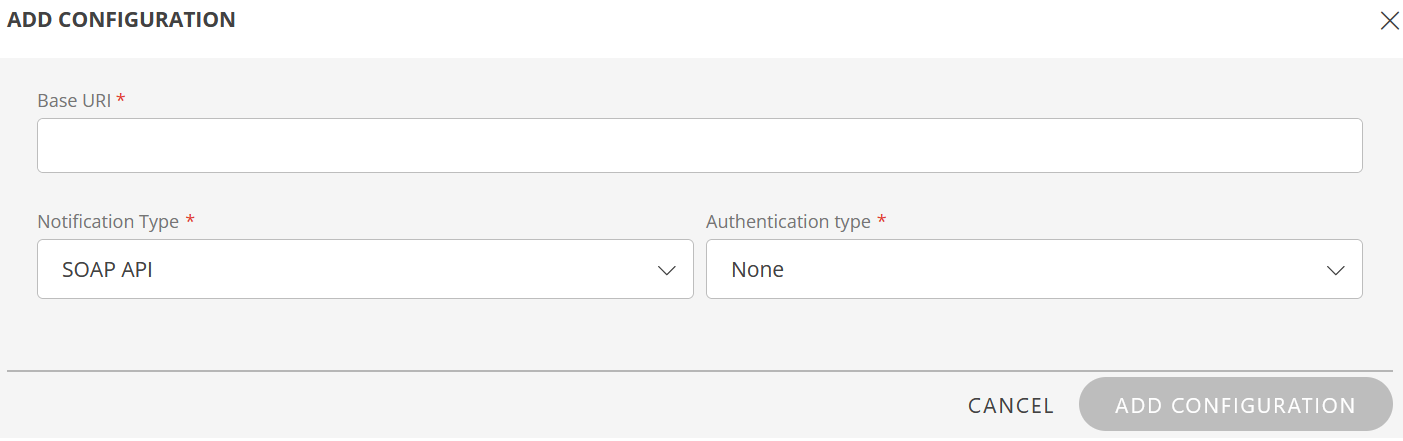
CONFIGURATION: Click add and enter the following information in the ADD CONFIGURATION window:
Field Name
Field Type
Description
Base URI
String
Enter the Base URI. Example: https://abc.opsramp.net/api/v2/tenants/tenantId/
Notification Type
Dropdown
Select notification type as REST API or SOAP API based on your requirements.
Authentication Type
Dropdown
Select an Authentication Type: None, Basic, OAuth2, JWT, Custom. The Authentication Types are displayed based on the Notification Type selected.
Click ADD CONFIGURATION. The configuration details are added and displayed in the Configuration section.
Use the edit icon to edit the details.
MAP ATTRIBUTES: Map the tenant entity attributes with OpsRamp entity. Click +ADD and enter the following information in the ADD MAP ATTRIBUTES window:
Field Name
Field Type
Description
OpsRamp Entity
Dropdown
Select OpsRamp entity from the dropdown.
OpsRamp Property
Dropdown
Select OpsRamp property from the dropdown. It will change based on entity selection.
CUSTOM Entity
String
Enter the Custom Entity in the box.
CUSTOM Property
String
Enter the Custom Property in the box.
PROPERTY VALUES: Click +PROPERTY VALUE. Enter the following information and click SAVE.
Field Name
Field Type
Description
CUSTOM Property Value
String
Enter custom property value in the box.
OpsRamp Property Value
Dropdown
Select a value from the dropdown. Based on the OpsRamp Property selected, the options in this field vary.
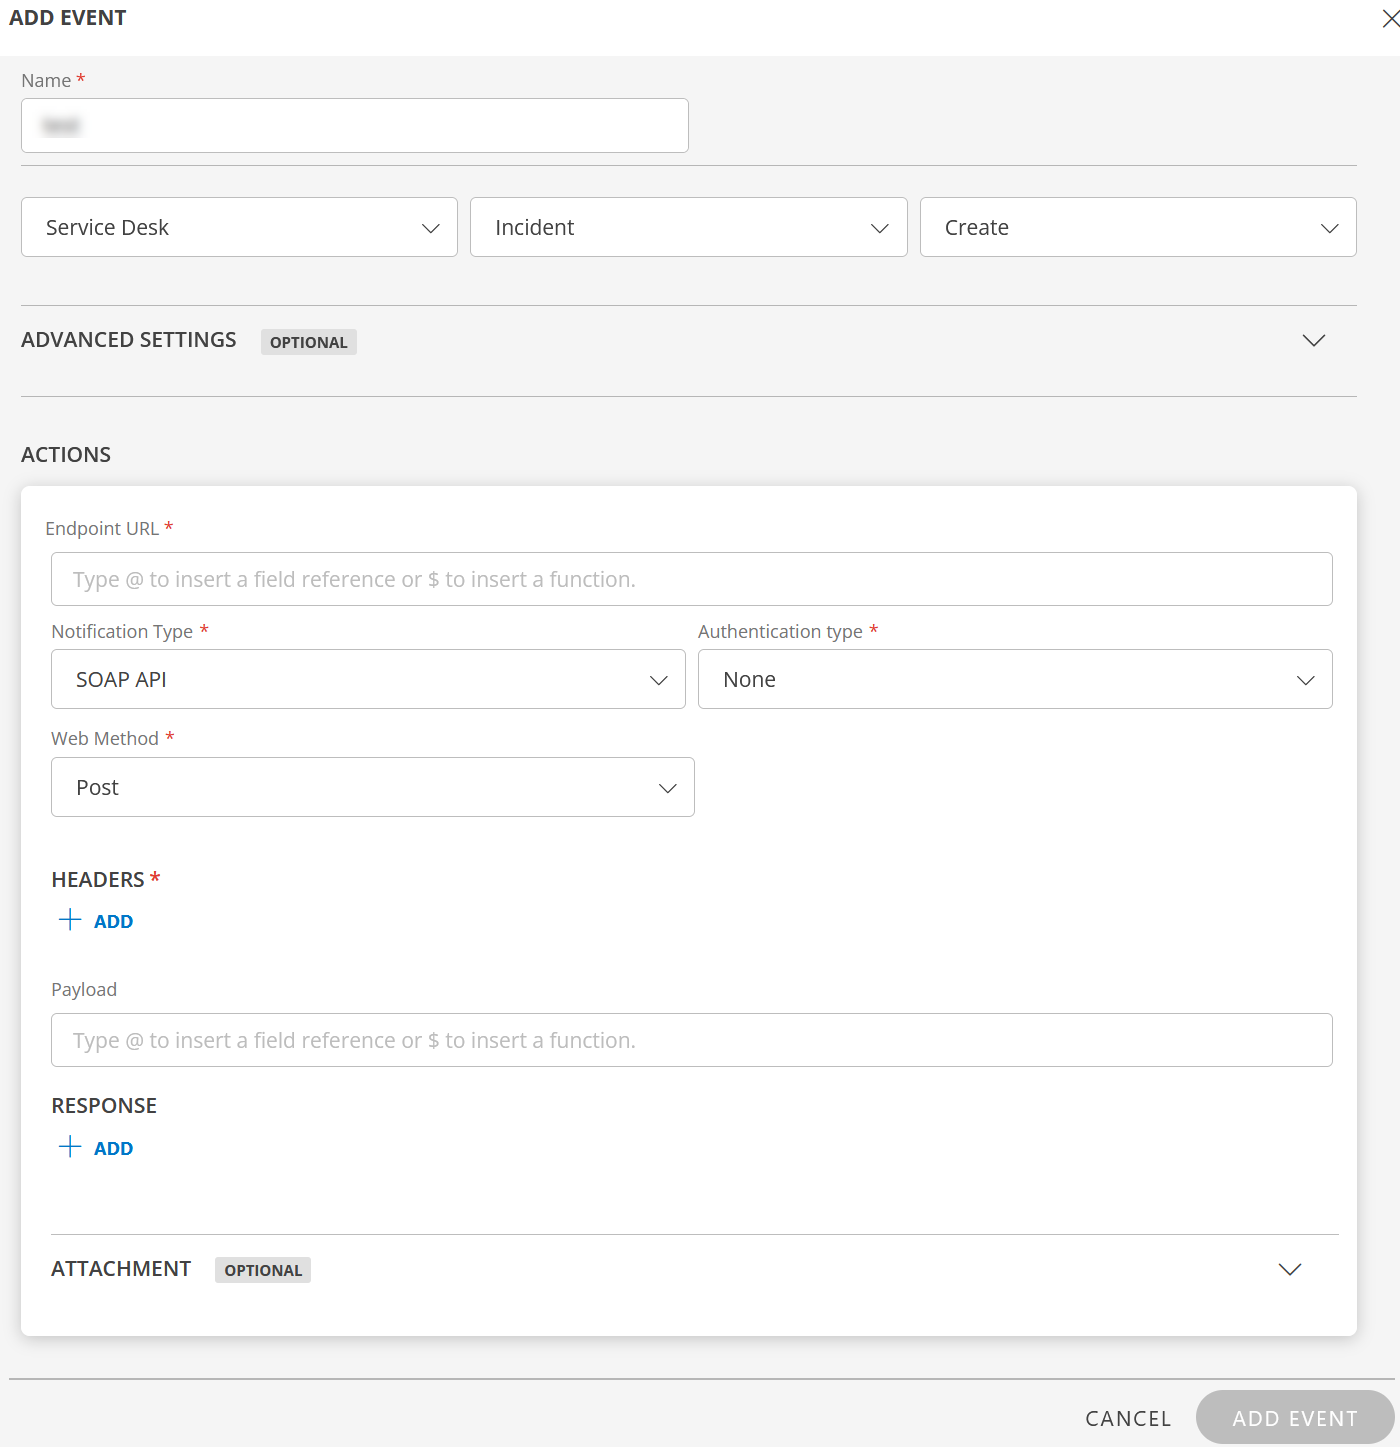
EVENTS: Send notifications when an action is performed on OpsRamp entities. Click +ADD and enter the following information in the ADD EVENT window:
Field Name
Field Type
Description
Name
String
Enter a name for the event. Select the Entity, Entity Type, and Entity Type Event from the dropdown lists.
ADVANCED SETTINGS (Optional): Click +ADD and enter the values for Property, Operator, and Value and click SAVE.
Use the delete icon to delete the condition.
ACTIONS: Enter the following information in the ACTIONS section: If you want to inherit parent configuration, select Use parent configuration checkbox.
Field Name
Field Type
Description
Endpoint URL
String
Enter Endpoint URL. Type @ to insert a field reference or $ to insert a function. Select the Entity, Entity Type, and Entity Type Event from the dropdown lists.
Notification Type
Dropdown
Select notification type as REST API or SOAP API based on your requirements.
Authentication Type
Dropdown
Select an Authentication Type: None, Basic, OAuth2, JWT, Custom. The Authentication Types are displayed based on the Notification Type selected.
Web Method
Dropdown
Select web method: Post, Put, Get, Delete, or Patch.
HEADERS: Click +ADD and select the Key and Value from the dropdowns, and click SAVE to add the header. You can also type the values in the boxes and select the values to add.
Enter the payload in the box. Type @ to insert a field reference or $ to insert a function.
RESPONSE: Click +ADD. Select Key from the dropdown, enter Value in the box, and click SAVE to add the response.
ATTACHMENT (OPTIONAL): Click the down arrow to open the Attachment section. This section is optional.
Field Name
Field Type
Description
Attachment Endpoint URL
String
Enter Attachment Endpoint URL. Type @ to insert a field reference or $ to insert a function.
Process Type
Dropdown
Select process type: Pre process or Post process.
Web Method
Dropdown
Select web method: Post, Put, Get, Delete, or Patch.
ATTACHMENT HEADERS: Click +ADD and enter the following information:
Select Key and Value from the dropdowns. You can also type the values in the boxes and select the values to add.
Click SAVE to add Attachment Header.
Attachment Payload: Enter Attachment Payload. Type @ to insert a field reference or $ to insert a function. See Integration Events for information on how to add a placeholder.
Attachment Response: Enter Key and Value in the boxes.
Click ADD EVENT to add the event.
There are some actions you can perform on the Event(s). See here for more details.
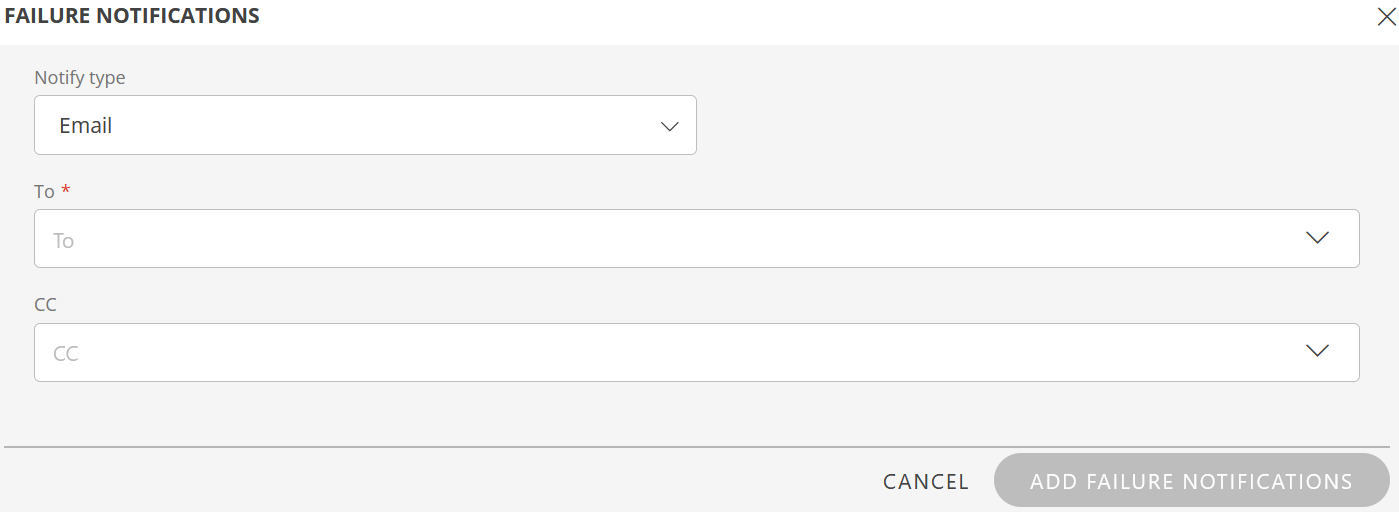
FAILURES: In case of failure in integration, an Email is sent to the user about the failure in integration. To configure failure notification, click add in the FAILURES section and enter the following information in the FAILURE NOTIFICATIONS window:
Select notification type as Email.
Enter the email address(es) in the To and CC fields. To enter the email address(es) in the fields, type the email address and hit enter, or select it from the dropdown.
Click ADD FAILURE NOTIFICATIONS. The details are added.
Use the edit icon to edit the failure notification. Note: The Failures section is displayed only if Events are configured.
Click FINISH. Custom integration is installed and displayed under Installed Integrations.
Outbound - Configuration
Based on the Notification Type selected, the values in the Authentication type change.
REST API: If you select REST API as Notification Type, the Authentication type dropdown will have None, Basic, OAuth2, JWT, and Custom options.
Basic: If you select Basic as Authentication type, enter User Name and Password. OAuth2: If you select OAuth2 as Authentication type, do the following:
Select Grant Type from the dropdown. If you select Password Credentials or Refresh Token as Grant Type, enter the User Name and Password.
Enter Access Token URL.
Enter the Key and Secret.
Enter the Scope.
JWT: If you select JWT as Authentication type, do the following:
Enter Token URL in the box.
Enter the User Name and Password.
Enter the Token Payload in the box.
TOKEN HEADERS: The Name and Value is displayed by default. You can change it accordingly.
TOKENS PATH: Enter Name (displayed by default) and Value in the boxes and click SAVE. RESOURCE AUTHORIZATION HEADERS: Enter Name and Value (displayed by default) in the boxes and click SAVE.
Custom: If you select Custom as Authentication type, do the following:
Enter Token URL in the box.
Enter the Token Payload in the box.
TOKEN HEADERS: The Name and Value is displayed by default. You can change it accordingly.
TOKENS PATH: Enter Name (displayed by default) and Value in the boxes and click SAVE. RESOURCE AUTHORIZATION HEADERS: Enter Name and Value (displayed by default) in the boxes. CUSTOM PARAMETERS: Enter the Key and Value in the boxes and click SAVE to save the custom parameter.
SOAP API: If you select SOAP API as Notification Type, the Authentication type dropdown will have None and Basic options.
Basic: If you select Basic as Authentication type, enter User Name and Password.
Actions on Integration
You can perform actions like View Logs, Export, Edit, Assign Templates, and Uninstall on the integration.