You can create incidents, service requests, and change requests through the Email Requests integration of OpsRamp.
Email Requests integration offers the following benefits:
Convenience: You can submit requests from the email box without logging into a separate platform, making the process more convenient.
Automation: The integration parses incoming emails automatically, categorizes requests, and initiates workflows without any need of manual intervention. This automation speeds up the processing of requests.
Configure integration
To configure the Email Requests integration:
Click All Clients, select a client.
Click Setup > Account.
Select the Integrations tab.
The Installed Integrations screen is displayed, with all the installed applications. Click + ADD on the Installed Integrations page.
If you do not have any installed applications, you will be navigated to the Available Integrations page. The Available Integrations page displays all the available applications along with the newly created application with the version. Note: Search for the application using the search option available. Alternatively, use the All Categories option to search.
Click ADD on the Email Requests tile.
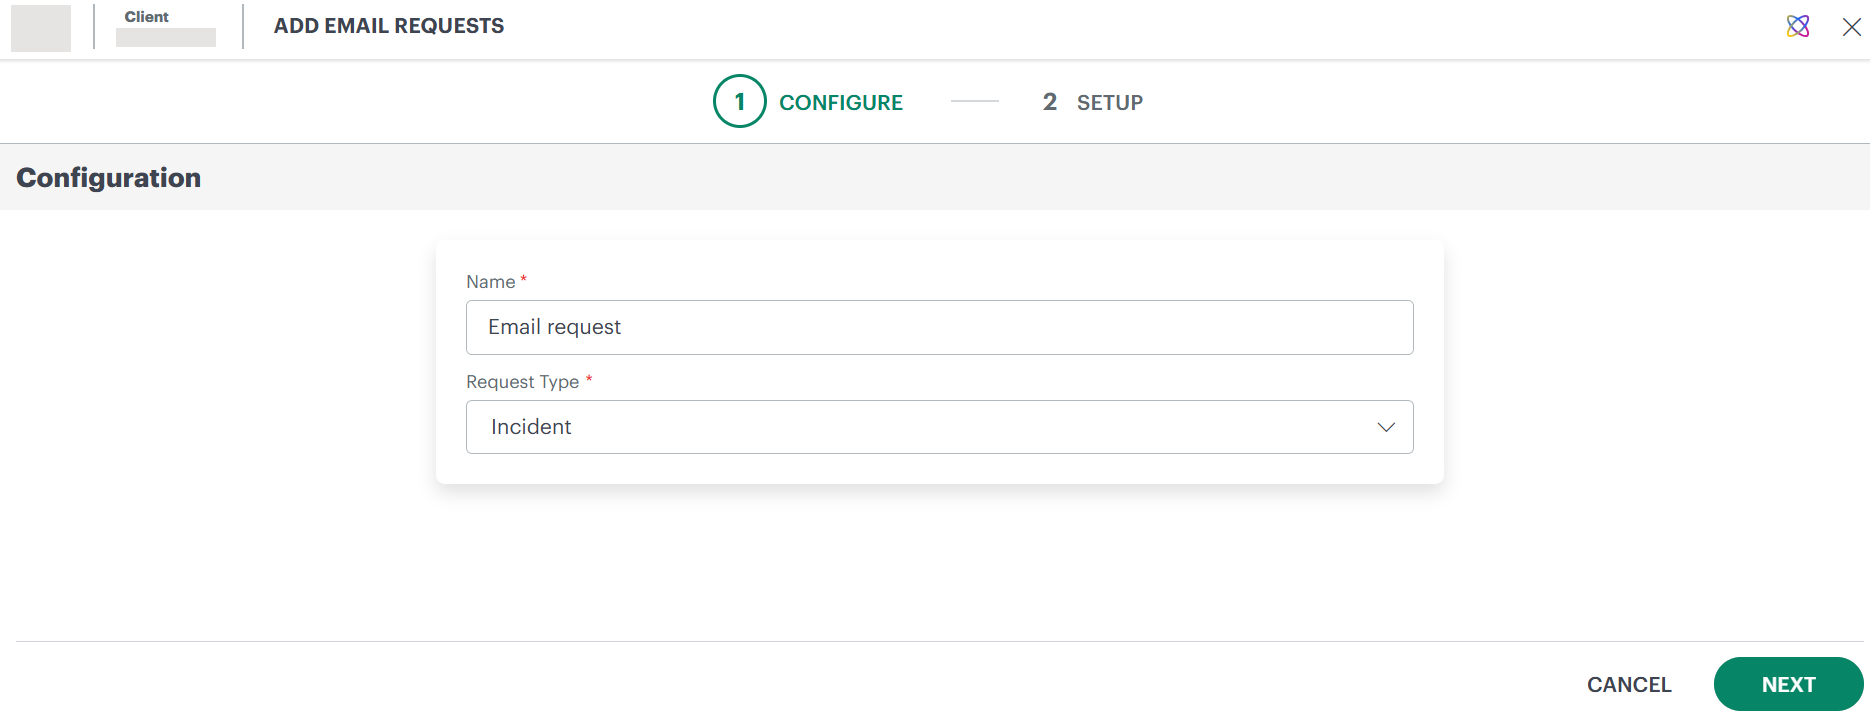
Enter the following information in the Configure tab:
Name: Enter a unique name for the integration.
Request Type: Select either Incident, Service Request, or Change Request.
Click Next.
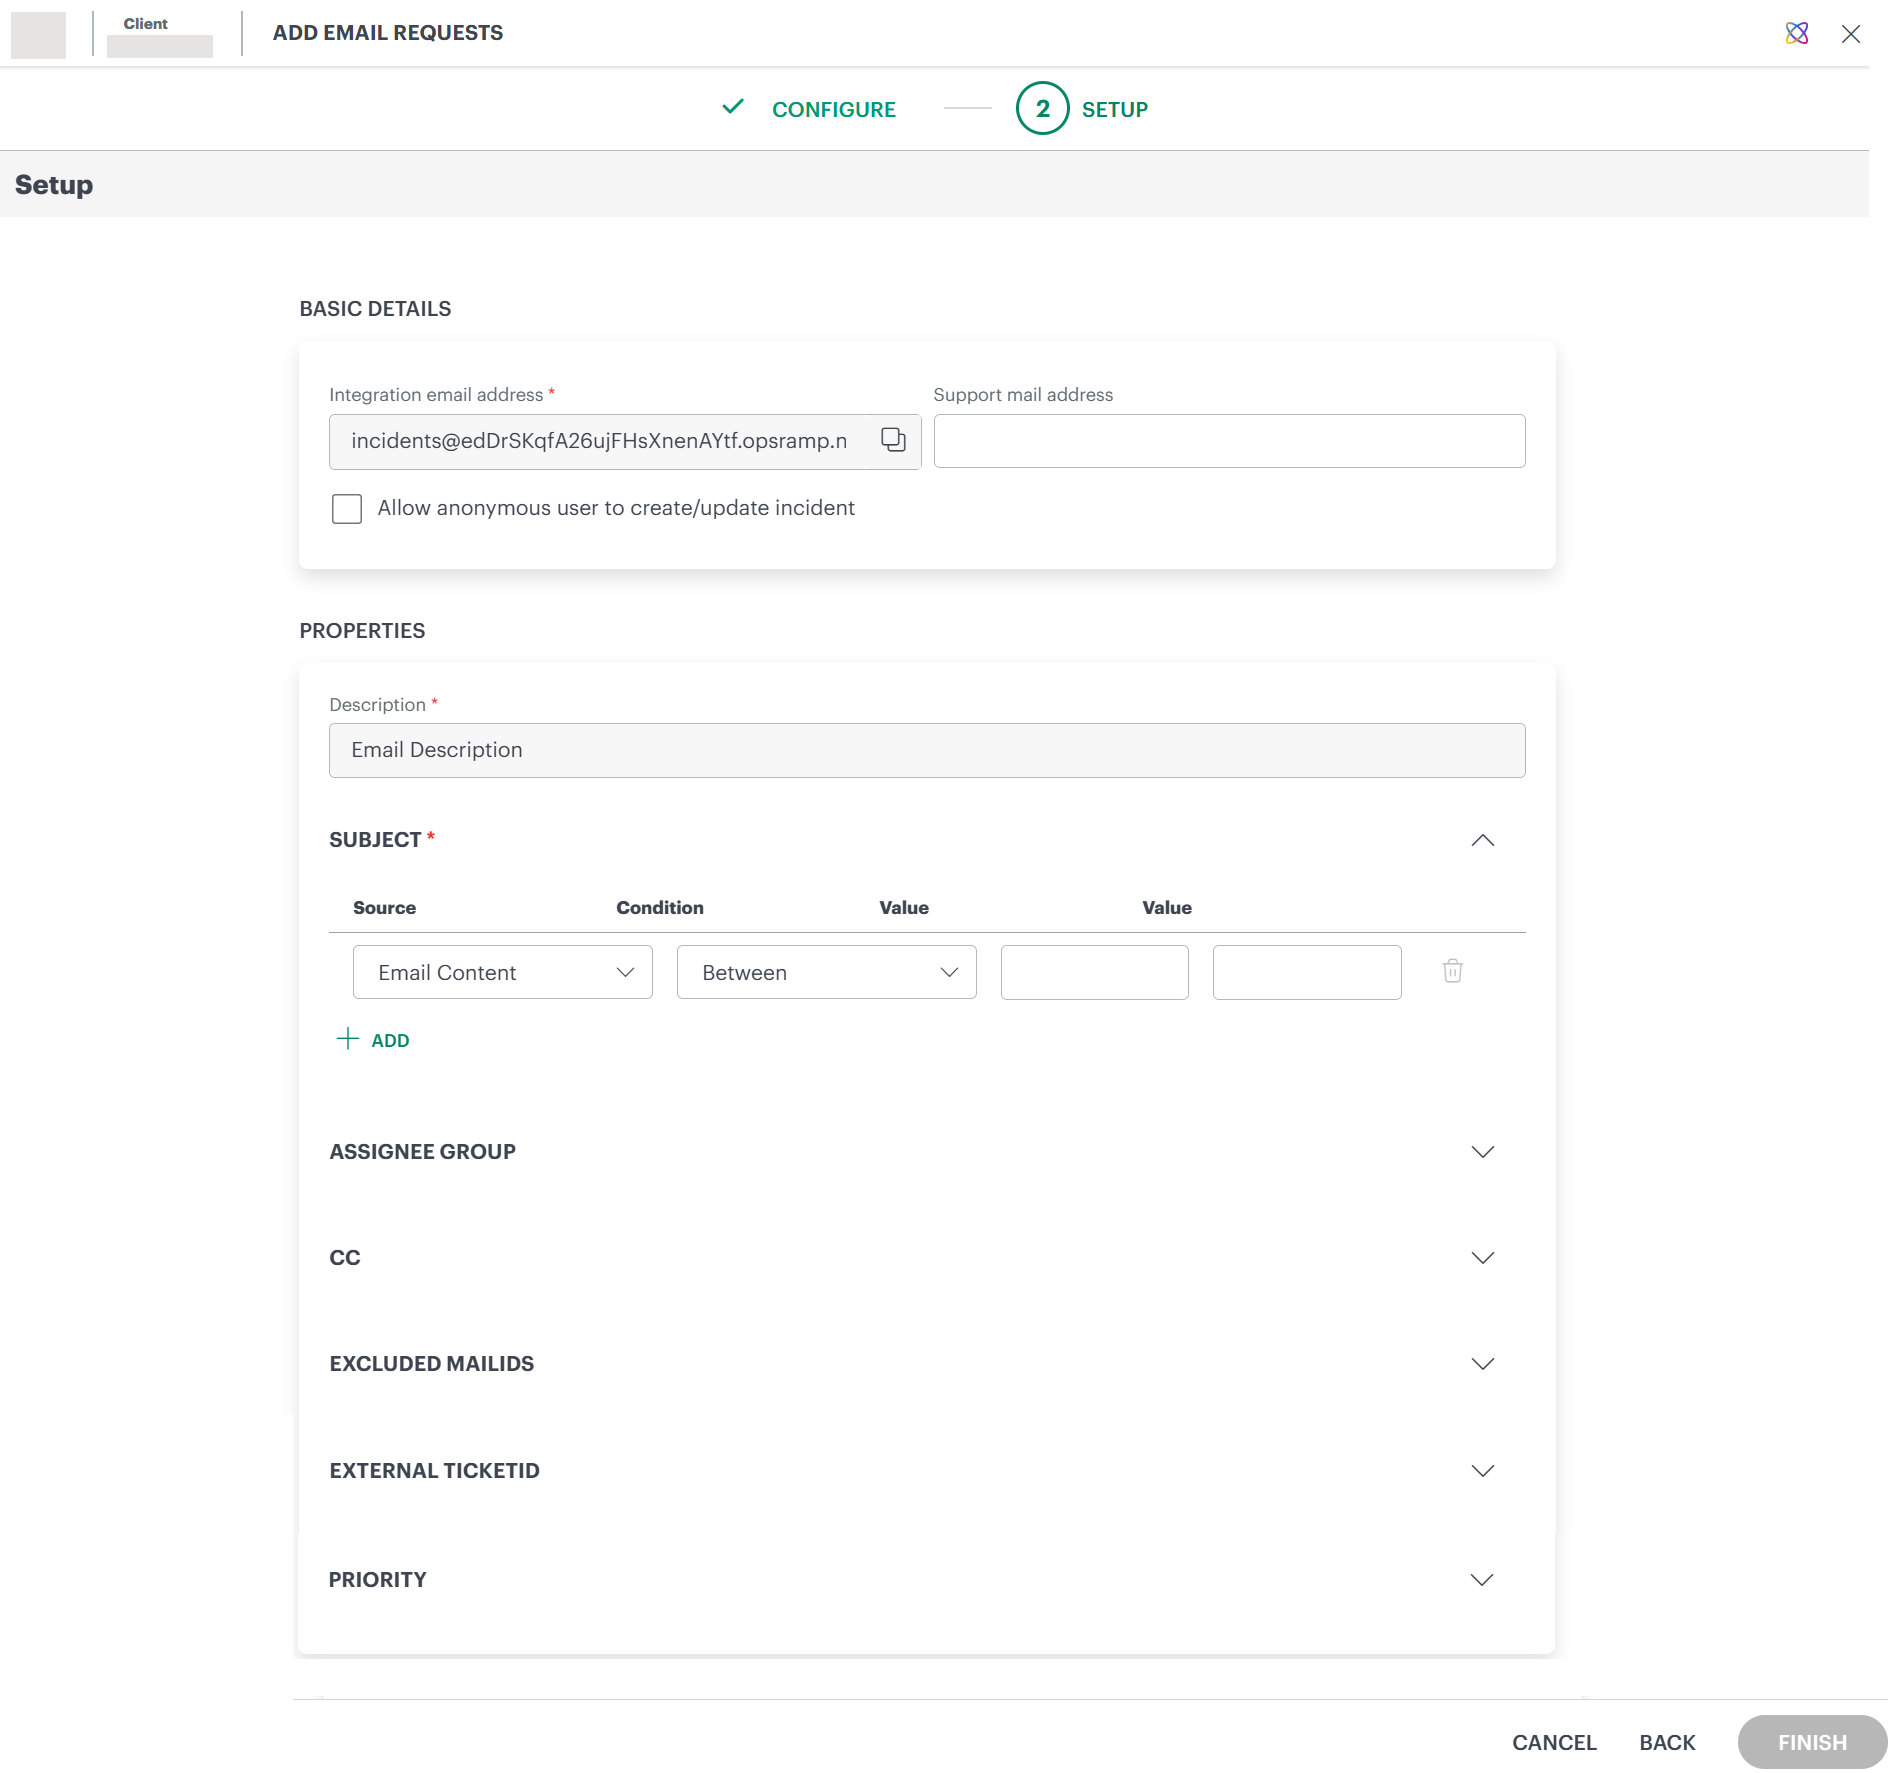
For Request Type as Incident or Service Request, the following fields are displayed in the Setup tab:
Enter the following information:
Basic Details:
Field Name
Field Type
Description
Integration email address
String
This email ID appears by default.
Support mail address
String
Enter the support email address as needed.
Allow anonymous user to create/update incident
Checkbox
Select this checkbox, if you want to allow any external user to create or update the incident.
Properties:
Field Name
Field Type
Description
Description
String
This is a read-only field. The system automatically takes the entire content of the email (the full email body) and uses that as the incident's description at the time of incident creation.
Subject
Dropdown
To parse a default email Subject, select the source, select the condition, enter the value(s) and click SAVE.
Assignee Group
Dropdown
Select a group from the drop-down list. The incident that is created is assigned to this group.
CC Email
Dropdown
Enter the email address(es). The incident created will be emailed to these email addresses.
Excluded MailIds
Dropdown
To enter the email address(es), type the email address and hit enter or type the email address and select it from the drop-down. Requests from these email address(es) will be excluded.
External TicketID
Dropdown
To assign the third-party ticket to the incident, select the source, condition and enter the value(s).
Priority
Dropdown
Select source, condition, and enter the value(s). Select any value from the Priority drop-down list to set the `OR` condition.
If the parsed result has a valid priority, the request is created with that priority.
If the parsed result does not have a valid priority, the request is created with the default priority.
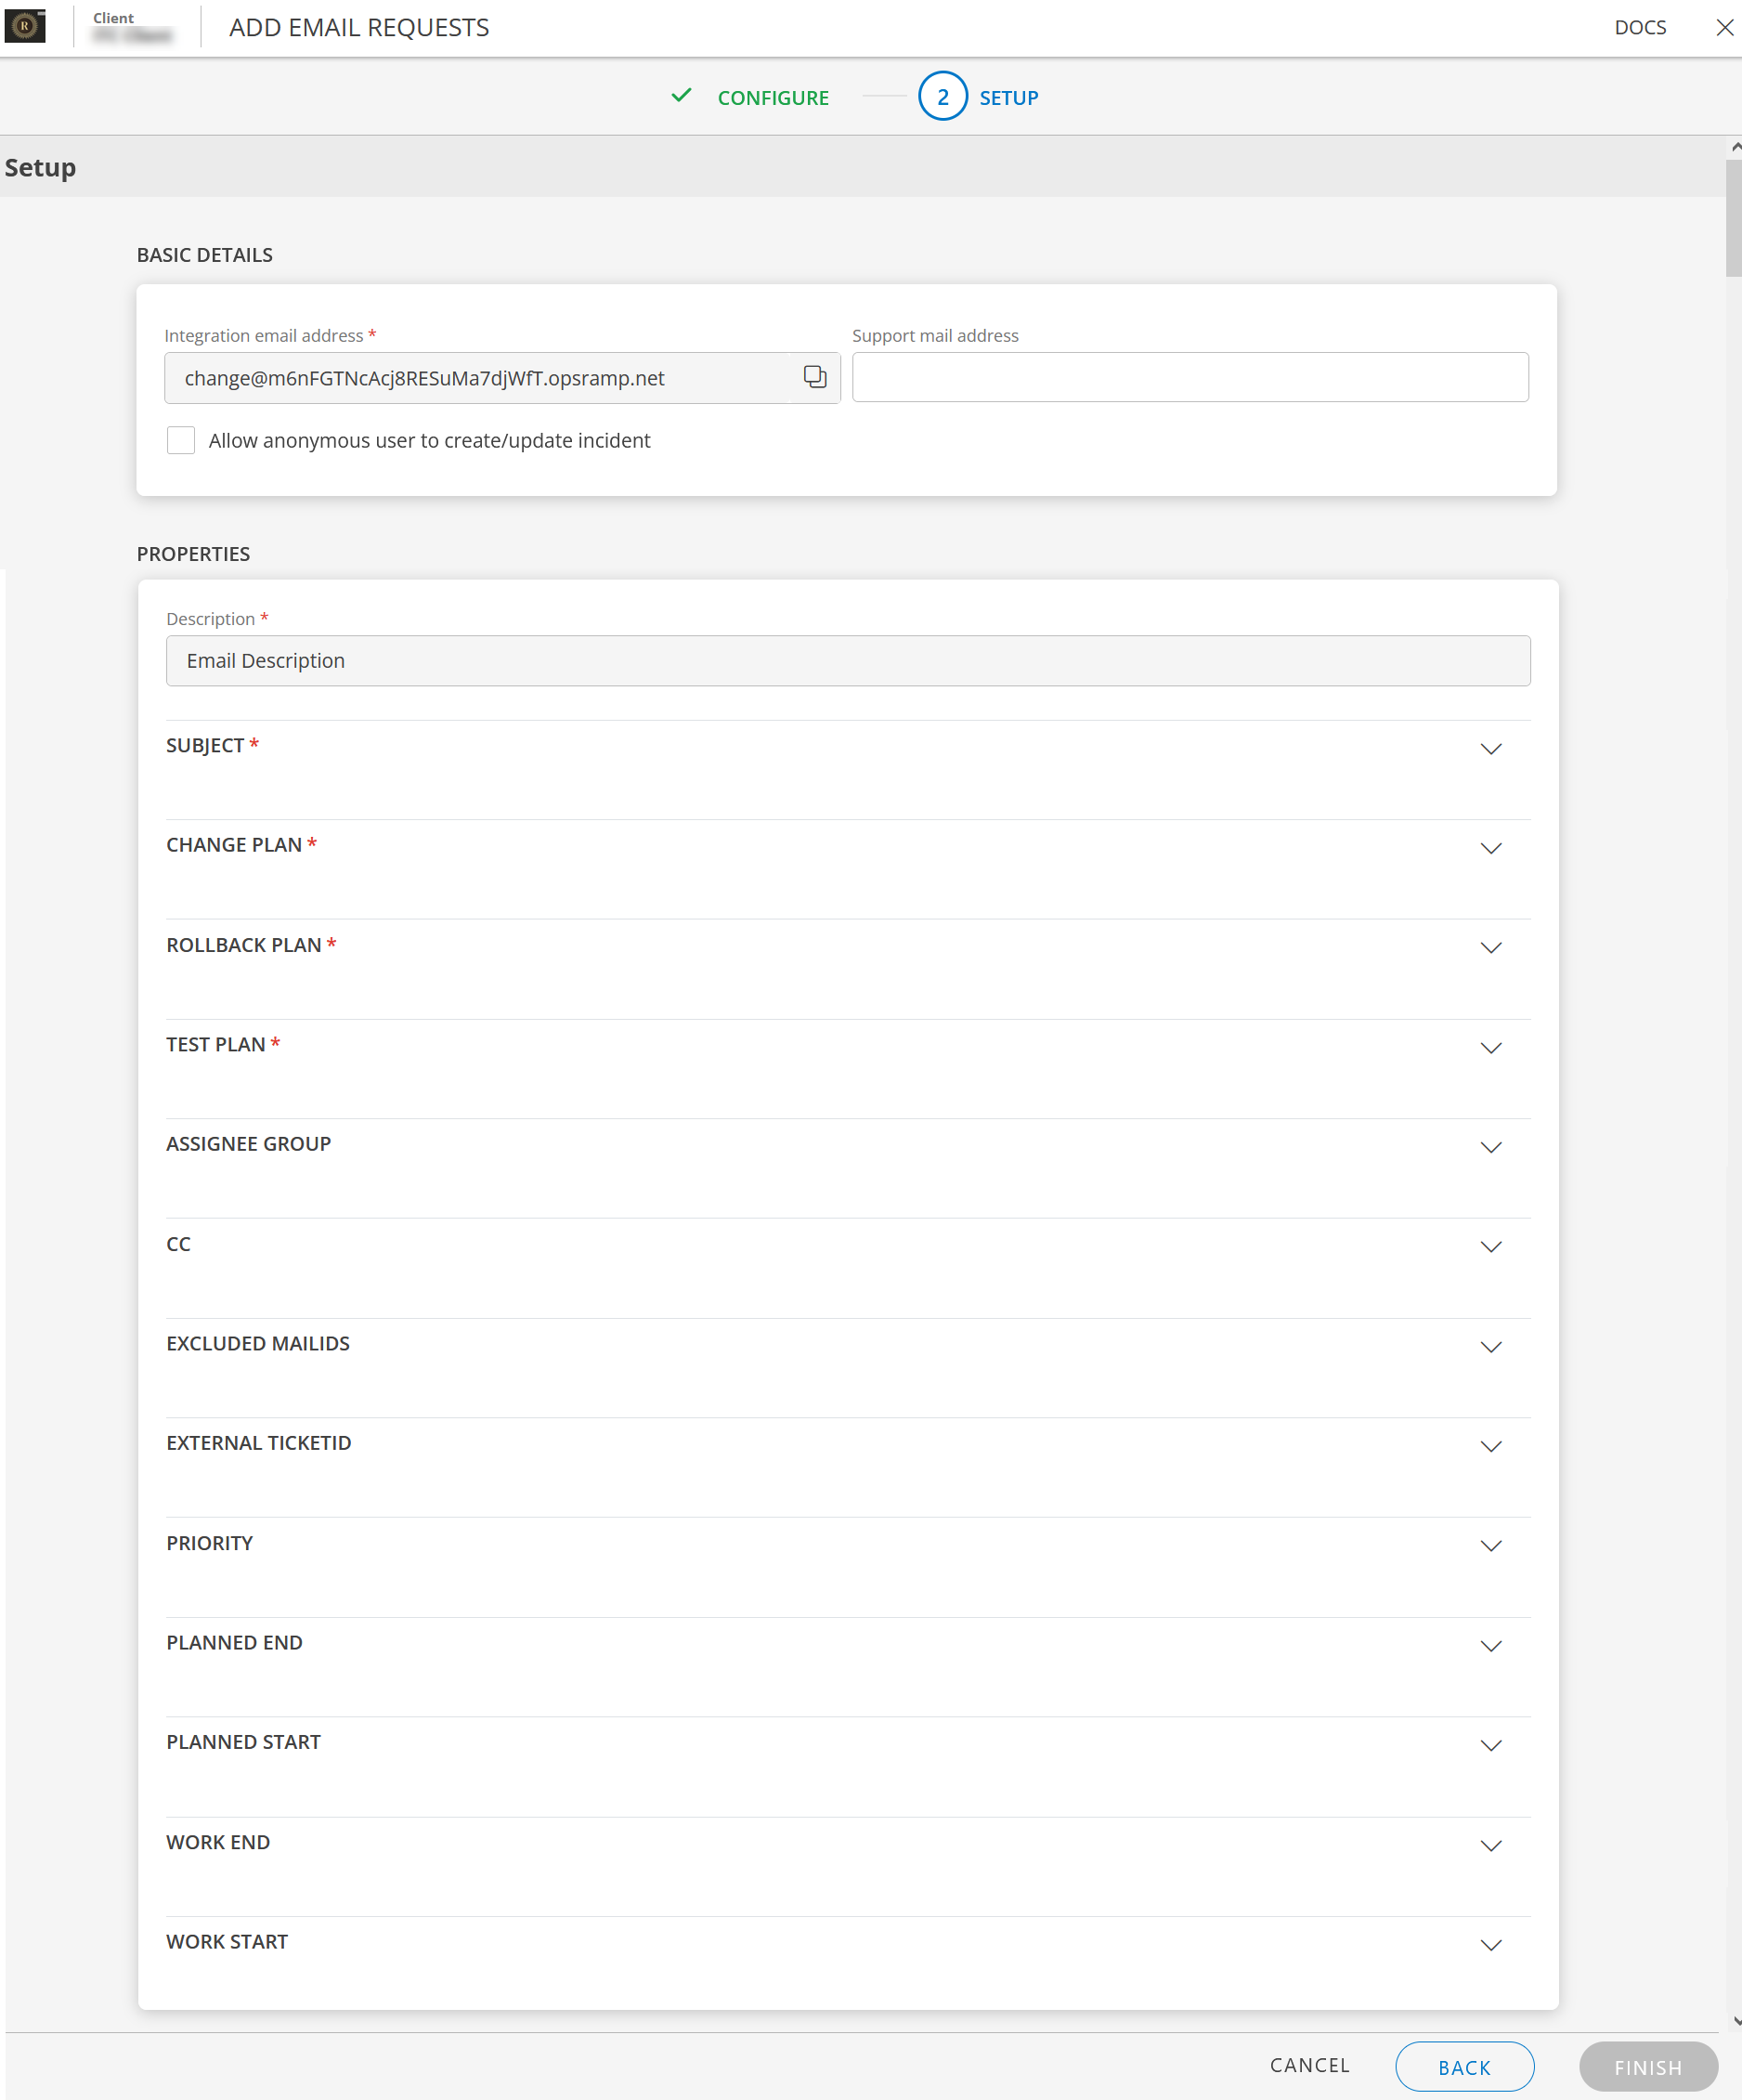
For Request Type as Change Request, the following fields are displayed in the Setup tab:
Enter the following information:
Basic Details:
Field Name
Field Type
Description
Integration email address
String
This email ID appears automatically.
Support mail address
String
Enter the support email address as needed.
Allow anonymous user to create/update incident
Checkbox
Select this checkbox, if you want to allow any external user to create or update the incident.
Properties:
Field Name
Field Type
Description
Description
String
This is a read-only field. The system automatically takes the entire content of the email (the full email body) and uses that as the incident's description at the time of incident creation.
Subject
Dropdown
To parse a default email Subject, select the source, select the condition, enter the value(s) and click SAVE.
Change Plan
Dropdown
Select the source, condition, and enter the value(s). The values derived from the criteria provided are set to Change Plan.
Rollback Plan
Dropdown
Select the source, condition, and enter the value(s). The values derived from the criteria provided are set to Rollback Plan.
Test Plan
Dropdown
Select the source, condition, and enter the value(s). The values derived from the criteria provided are set to Test Plan.
Assignee Group
Dropdown
Select a group from the drop-down list. The change request that is created is assigned to this group.
CC Email
Dropdown
To enter the email address(es), type the email address and hit enter or type the email address and select it from the drop-down. These email address(es) will be set in the CC field.
Excluded MailIds
Dropdown
To enter the email address(es), type the email address and hit enter or type the email address and select it from the drop-down. Requests from these email address(es) will be excluded.
External TicketID
Dropdown
Select the source, condition, and enter the value(s). The values derived from the criteria provided are set to External TicketID.
Priority
Dropdown
Select the source, condition, and enter the value(s). Select any value from the Priority drop-down list to set the `OR` condition.
If the parsed result has a valid priority, the request is created with that priority.
If the parsed result does not have a valid priority, the request is created with the default priority.
Planned End
Dropdown
Select the source, condition, and enter the value(s). The values derived from the criteria provided are set to Planned End.
Planned Start
Dropdown
Select the source, condition, and enter the value(s). The values derived from the criteria provided are set to Planned Start.
Work End
Dropdown
Select the source, condition, and enter the value(s). The values derived from the criteria provided are set to Work End.
Work Start
Dropdown
Select the source, condition, and enter the value(s). The values derived from the criteria provided are set to Work Start.
Click Finish.
Creating an email request - Example
In the following example, you want to create an incident with the following properties:
Email Subject: Incident created
Email Content:
Client Name : ABC Corporation
Device Name: HYDLPT000
Device Type: Laptop

The CPU Usage on the device is 2%. This value has exceeded 2% for 1 time(s) Priority High
To create an email request:
Compose an email with the subject and properties of the incident.
Send the email to the copied incoming email address.
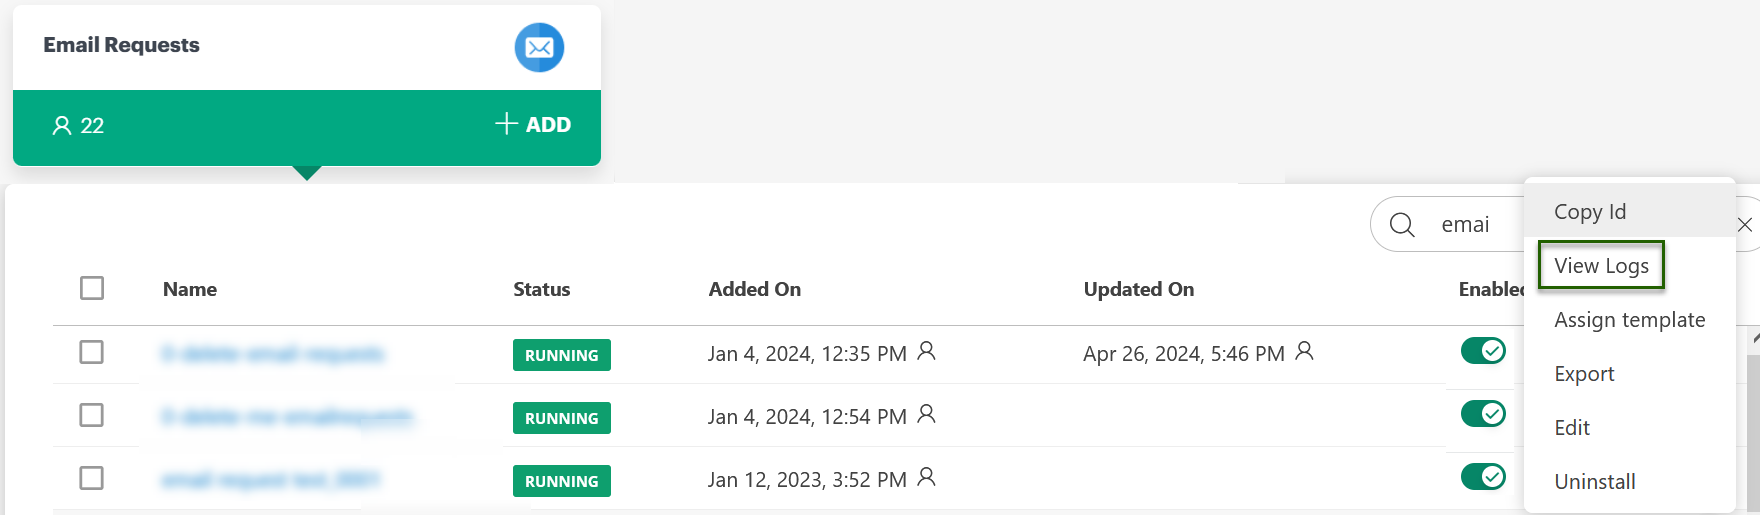
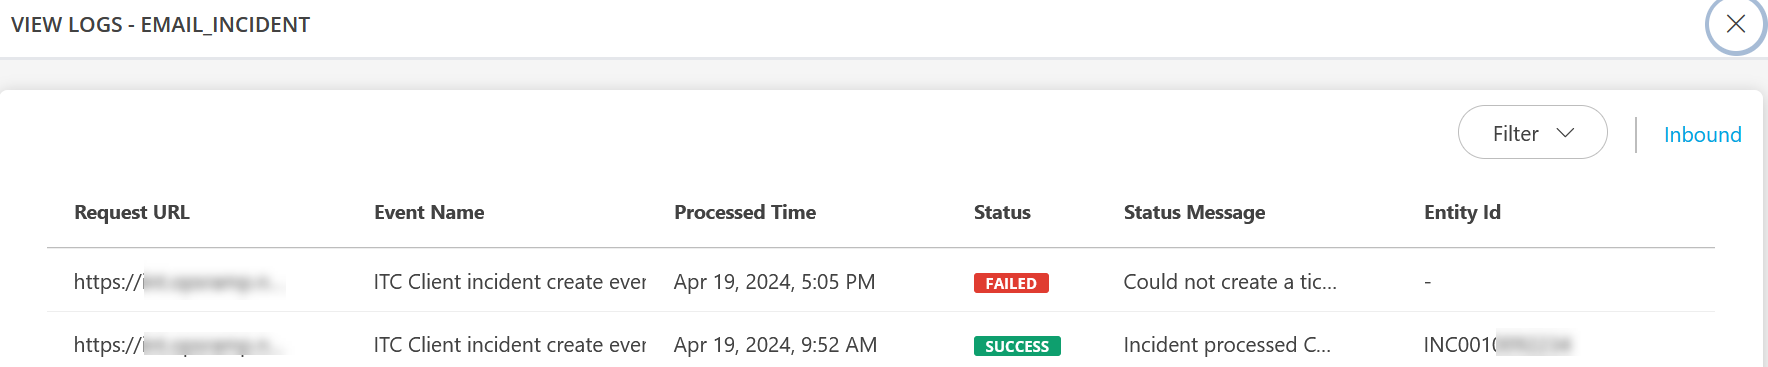
Click View Logs for the Integration to verify the status of the incident.
Logs list:
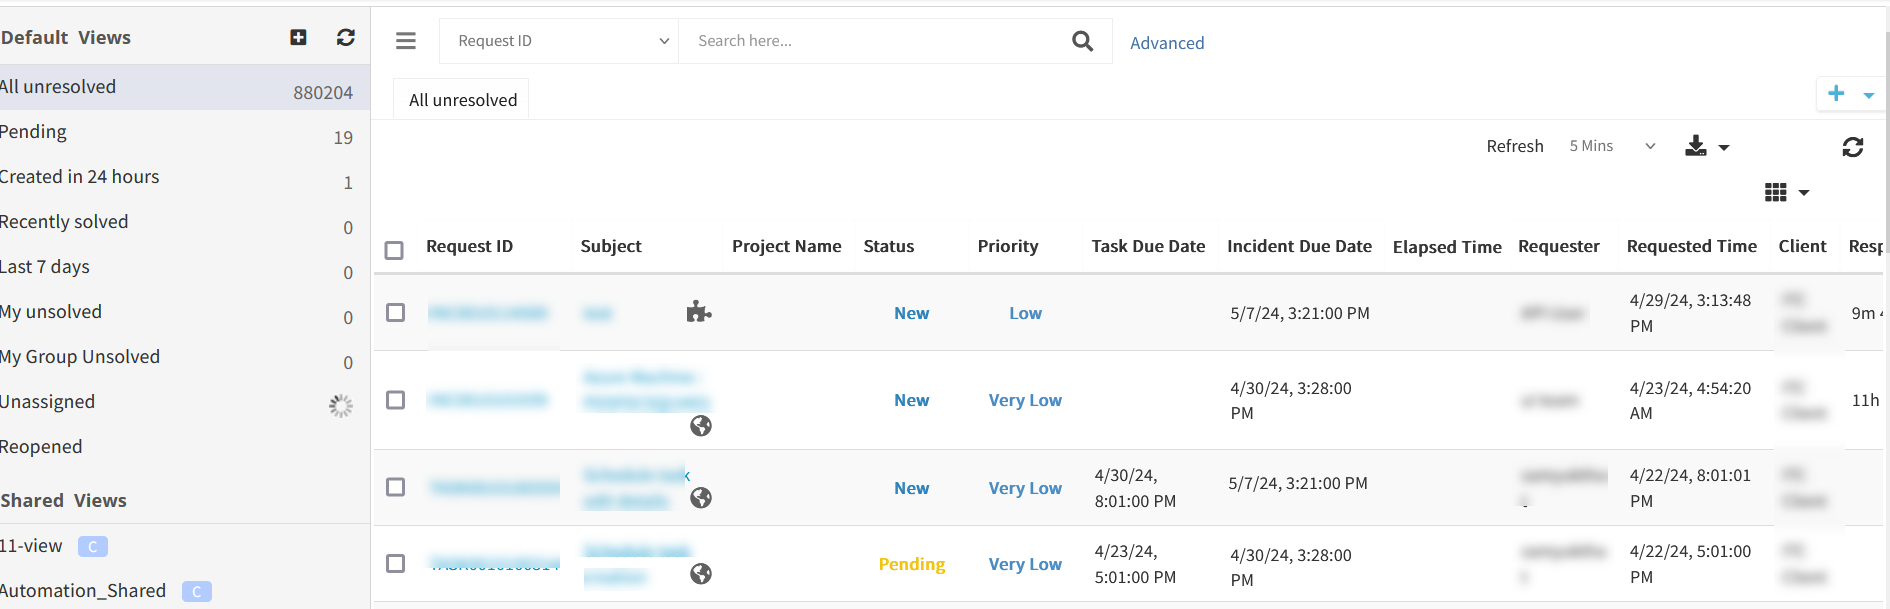
Incident created is displayed in Service Desk.
Service Request and Change Request can be created similarly.
Actions on Integration
You can perform the following actions on the integration.