Task is a one-time, non-recurring work assigned to a user and executed on selected resource/s for a certain stipulated time.
Planning, managing and execution of tasks are required as part of an IT service. Task scheduling is carried out by IT operations management. Task execution is automated in Service Desk that runs online tasks on specific date and time.
Configure tasks
Navigate to Setup > Account > Service Desk.The Settings page is displayed.
From the top navigation tabs, select Task.
From TASK SETTINGS, configure the Property settings.
Click Update.
Create a task
Navigate to Command Center > Tickets.The Tickets page is displayed.
Click ADD + and select Task.
The ADD TASK page is displayed.
Enter the following information:
Field name
Description
Partner
Select the Partner.
Client
Select the Client.
Project
Select the Project.
Subject
Title or short summary of Task.
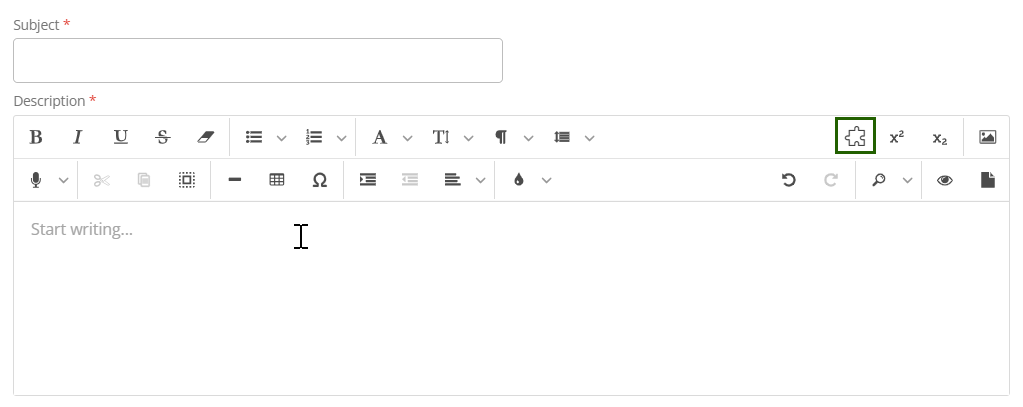
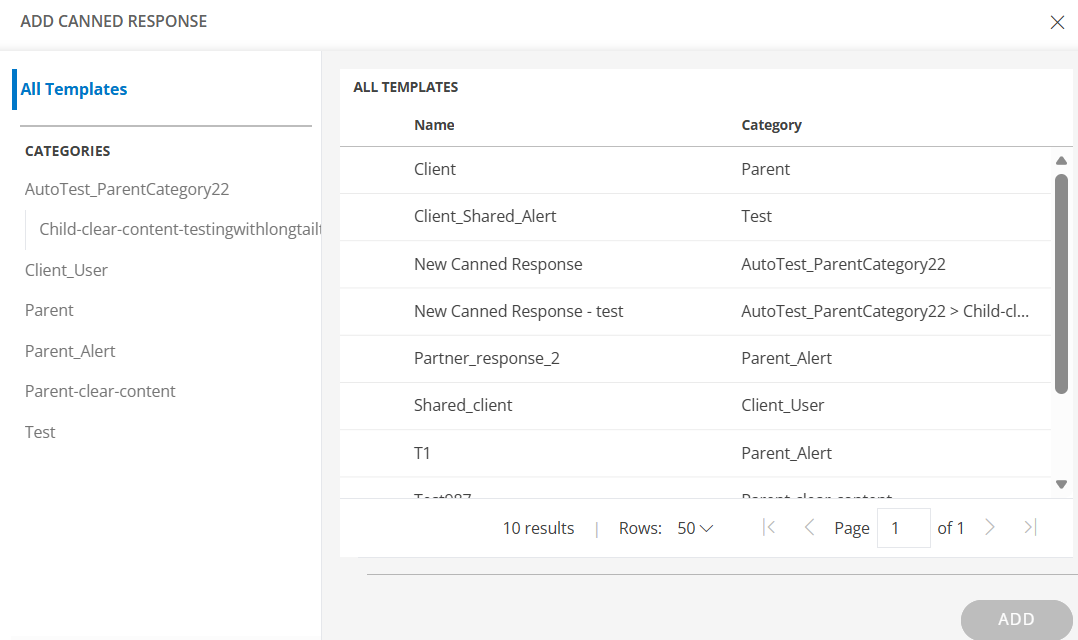
Description
Information required to describe Task. This can include details of the task and steps to execute the task.You can also use the Canned Response option to quickly insert predefined, categorized response templates. Click the Canned Response icon to view the available categories, select a template, and the content will be automatically added to the Description field.
User responsible for working on Task.You can either click ASSIGN TO ME to assign the task to yourself or choose a user from the list to assign it to someone else.
Resources
Resources for which Task is created.
Priority
Measure of how soon Task needs to be executed.
Estimated Hours
Estimated time duration in minutes for completion of Task.
Articles
KB articles that refer to similar Tasks in the past.
Click Create.
Edit task
Edit a single task
Navigate to Command Center > Tickets and select a task that you want to modify.
You can either click on the task ID to modify the details and save them or select Edit from the Actions dropdown menu to make changes to the details.
Edit multiple tasks
On the Tickets page, select the multiple tasks for which you want to perform a bulk update.
Click BULK UPDATE.The Update Actions page is displayed.
Make the necessary changes and click SAVE.
Add an auto-close policy to close a task
Configure auto-close policies to close tasks that are resolved and that are in an inactive state since a certain elapsed time.
Navigate to Setup > Account > Service Desk.
In the left navigation pane, navigate to the Automation section and select Auto Close Policies.The Auto Close Policies page is displayed.
From Auto Close Policies, select Auto Close Tasks.The POLICY - AUTO CLOSE TASKS screen is displayed.
Enter the following information:
Field
Description
Request Type
Type of the request.
Name
Auto-close policy name.
Reason
Reason for auto-close.
Tickets Resolved Exceeding
Inactive interval of a resolved service request beyond which the task needs to be closed.
Click SAVE to activate auto close.
Configure a scheduled task
Navigate to Setup > Account > Service Desk > Automation > Scheduled Tasks.
Click + ADD to create a new scheduled task.
In the ADD SCHEDULED TASK, enter the required information and click ADD SCHEDULED TASK.