Introduction
Registering your gateway securely connects your customer-managed gateway to the OpsRamp SaaS platform. All communication between your gateway and the OpsRamp SaaS platform uses secure protocols, ensuring data integrity and confidentiality.
Registering the OpsRamp Classic Gateway
After creating a Collector Profile, you can register your gateway using one of the following methods:
- Web User Interface
- Administration Console
Register via Web User Interface
To register the gateway using a web browser:
Step 1: Log in to the Gateway Administration Web UI
- Open a web browser and enter:
https://<Gateway IP>:5480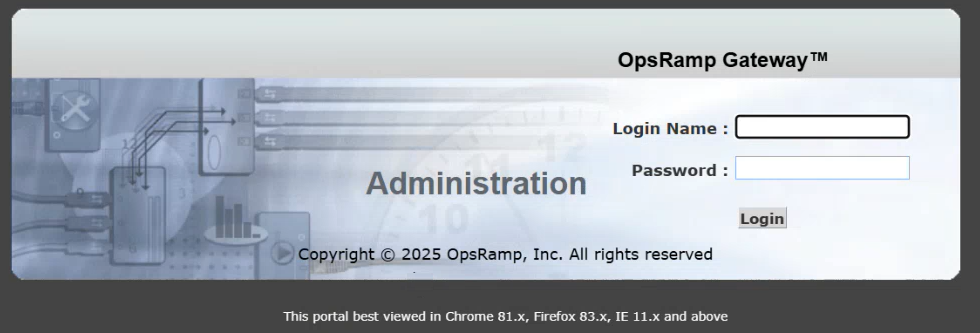
- Log in with the default credentials available in the OpsRamp portal under Setup > Account > Collector Profile. For more information on the default password, refer to Login Accounts.
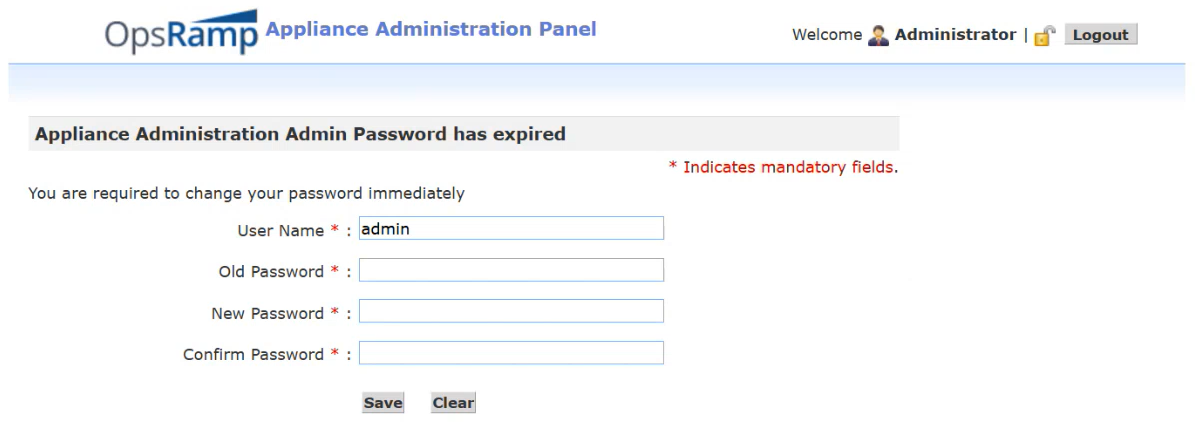
Step 2: Change the Password
When accessing the Gateway Admin UI for the first time, you will be prompted to change the password immediately.
Note
For security best practices, it is strongly recommended to change the default system password immediately after provisioning the gateway. This helps prevent unauthorized access.Step 3: Configure Network Settings
- Log in to the Gateway Web UI again using your new credentials.
- In the Appliance Administration Panel, navigate to Administration Menu > Network.
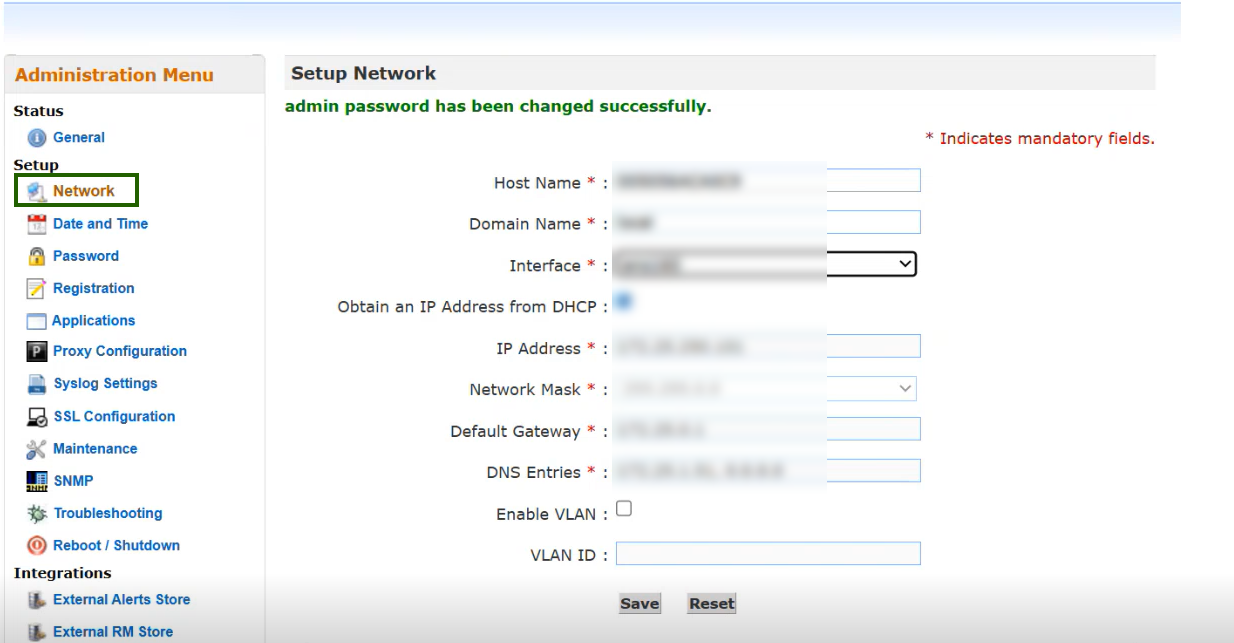
- Verify that the Host Name, IP Address, and all network settings are configured correctly.
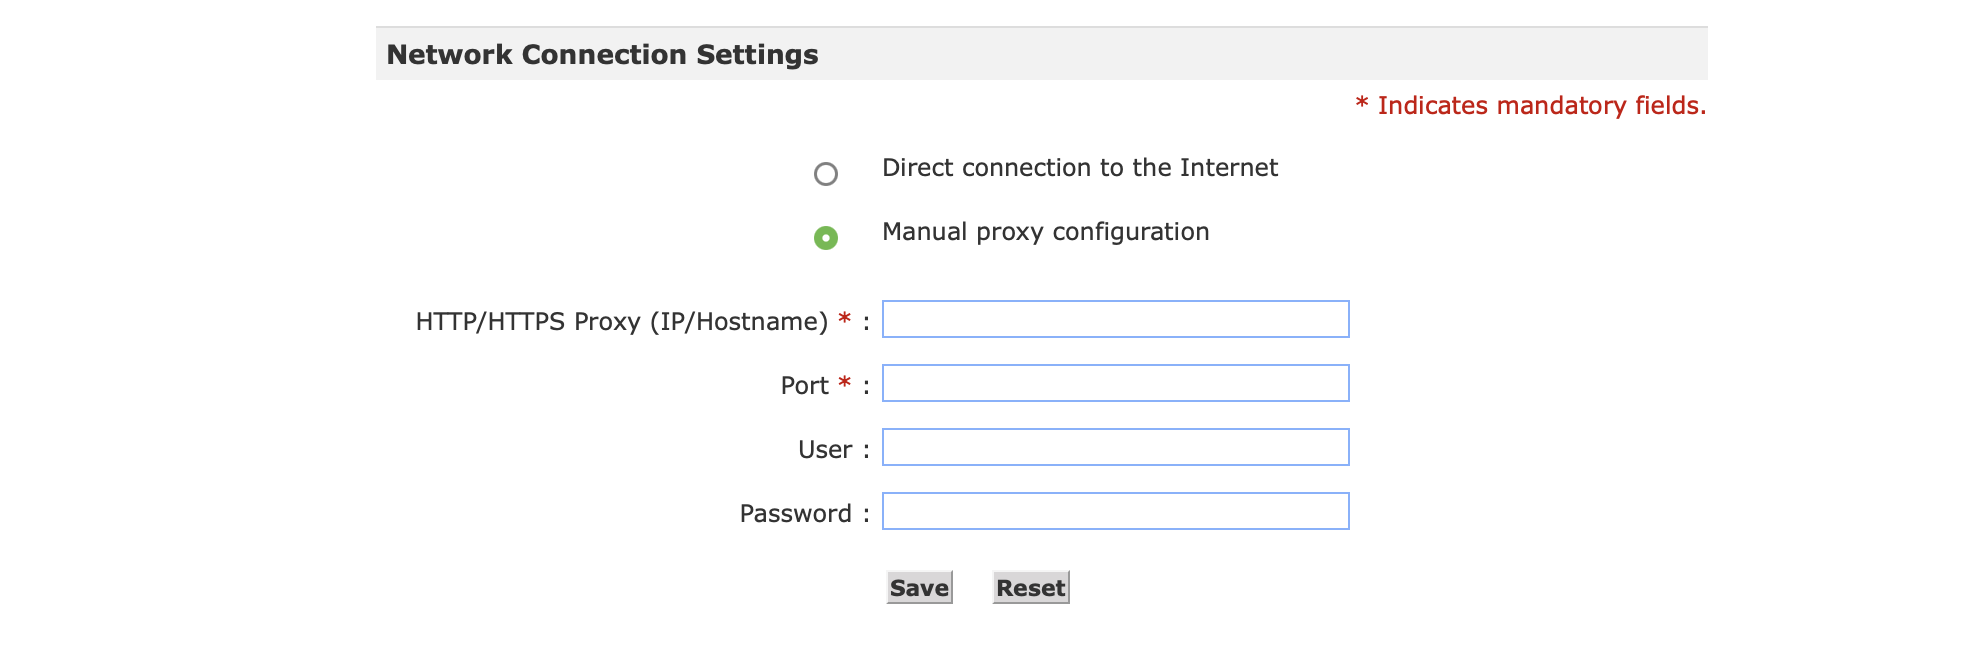
- To use a proxy, navigate to Network > Network Connection Settings and select the Manual proxy configuration option. By default, the Direct connection to the Internet option is selected.
Step 4: Register the Gateway
- Navigate to Administration Menu > Registration.
- Enter the Activation Key and OpsRamp Server details on the registration page.
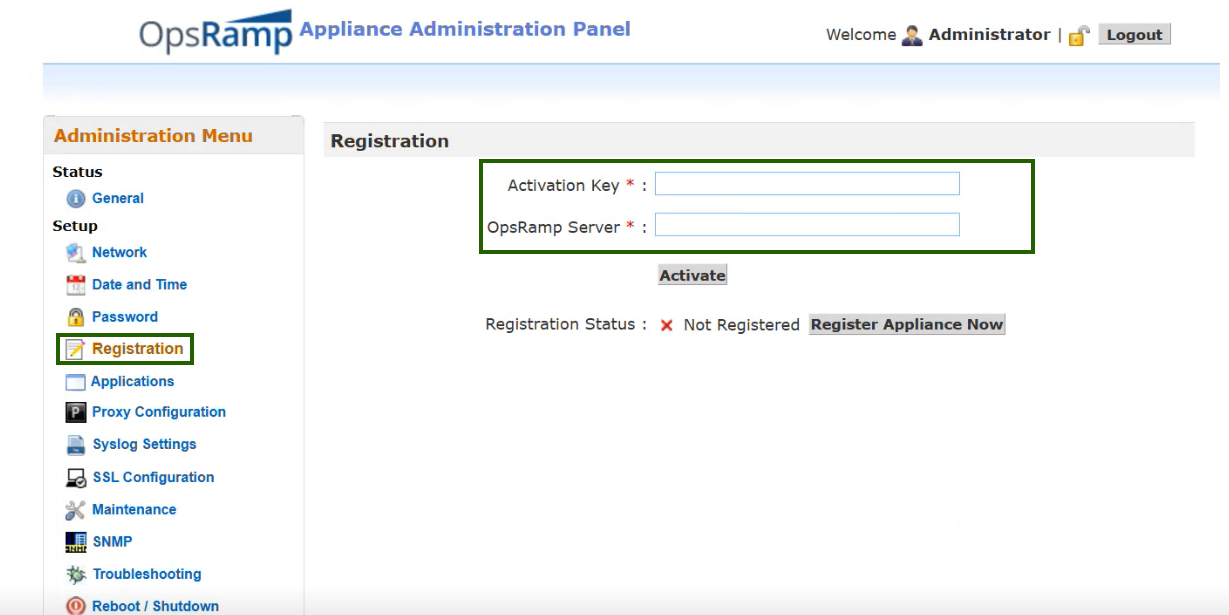
- To obtain the Activation Key and OpsRamp Server details, navigate to Setup > Account > Collector Profiles in the OpsRamp portal.
- Click Activate to complete the gateway registration.

Step 5: Verify Registration
- Registration may take a few minutes.
- Navigate to Setup > Account > Collector Profiles to confirm the gateway is connected.

Register via Administration Console (Serial UI)
To register the gateway using the administration console:
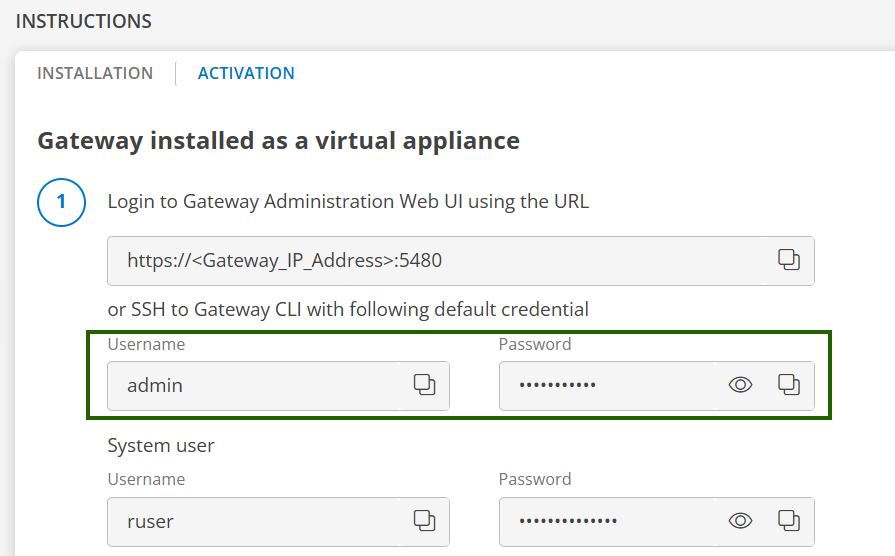
Step 1: Log in to the Gateway Virtual Machine (VM)
- Log in to the gateway CLI via SSH using your username and password available in the OpsRamp portal under Setup > Account > Collector Profile.
- After logging into the gateway VM, launch the Administration Console using the following commands:
- For non-root login:
sudo su admin - For root login:
su admin
- On your first login, the console will require you to change the default password. Enter and confirm a new password to complete the setup.
Note
For security best practices, it is strongly recommended to change the default system password immediately after provisioning the gateway. This helps prevent unauthorized access.Step 2: Verify Gateway Status
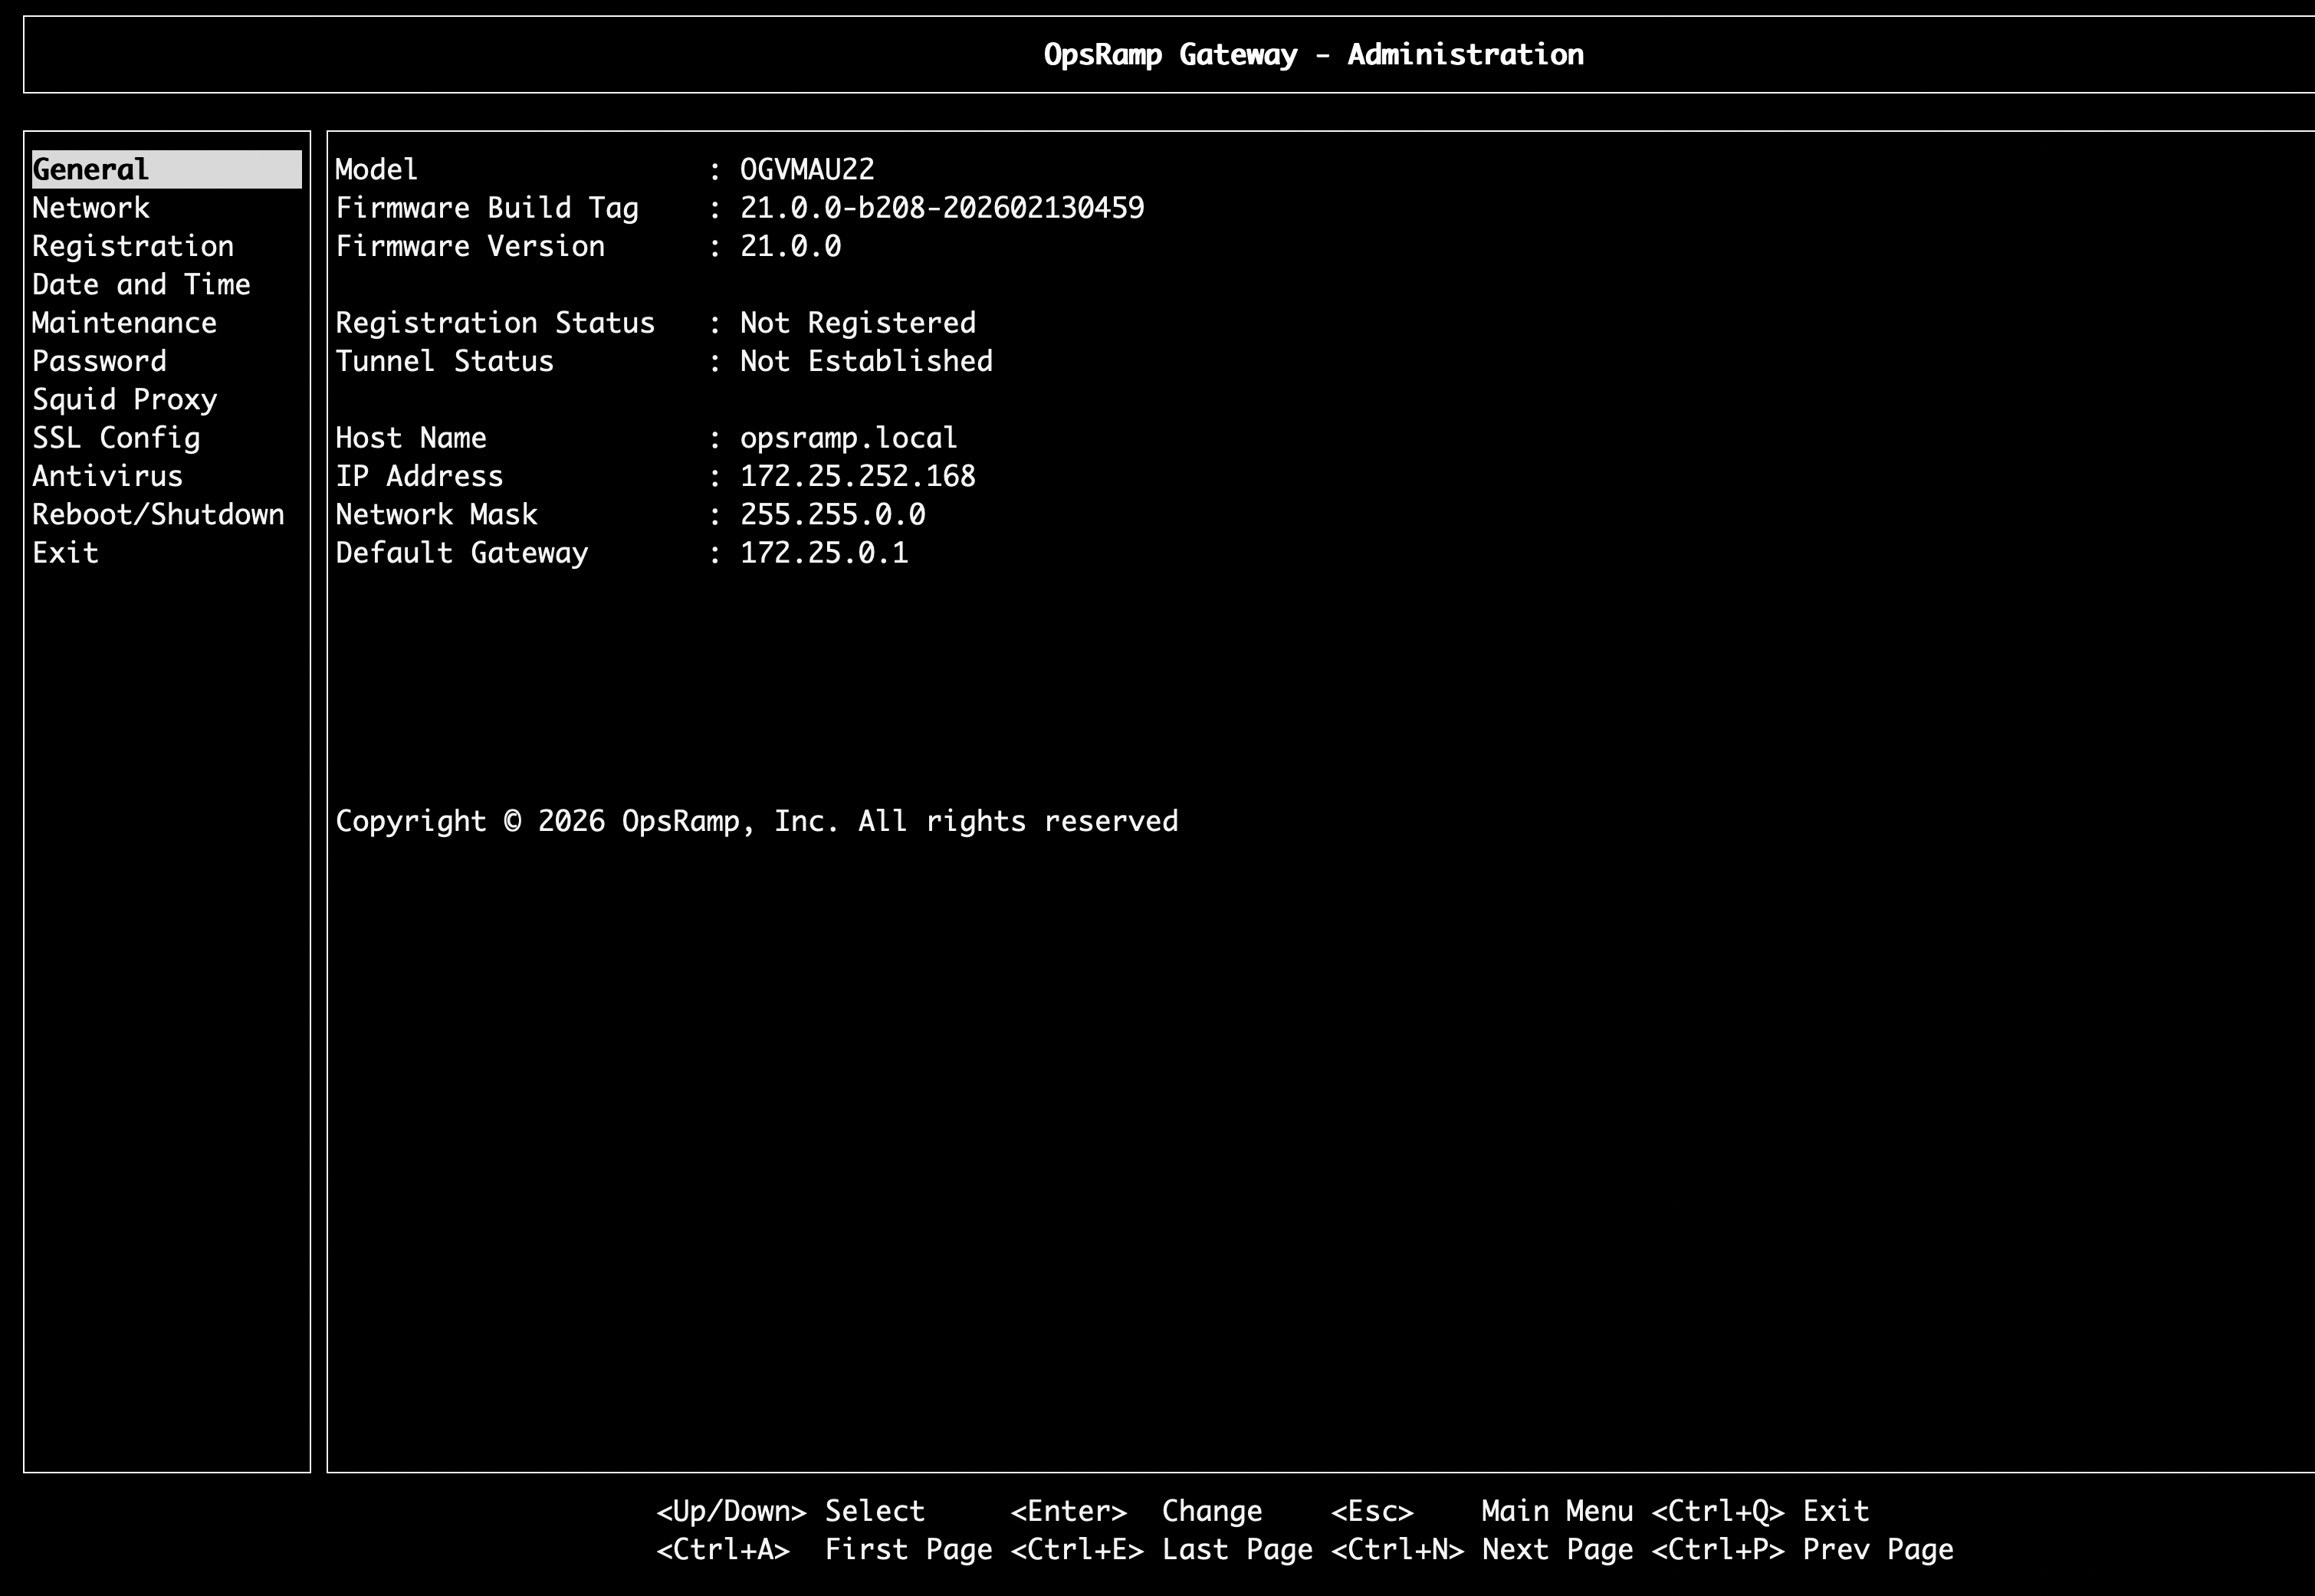
- Navigate to the General section under the Administration menu in the left pane.
- Confirm the following:
- Registration Status = Not Registered
- Tunnel Status = Not Established
Step 3: Configure Network Settings
- Go to the Network tab.
- Verify that the Host Name, IP Address, and all network settings are configured correctly.
- To use a proxy server, press CTRL+P to open Proxy Settings. By default, the gateway uses a direct internet connection.
Step 4: Register the Gateway
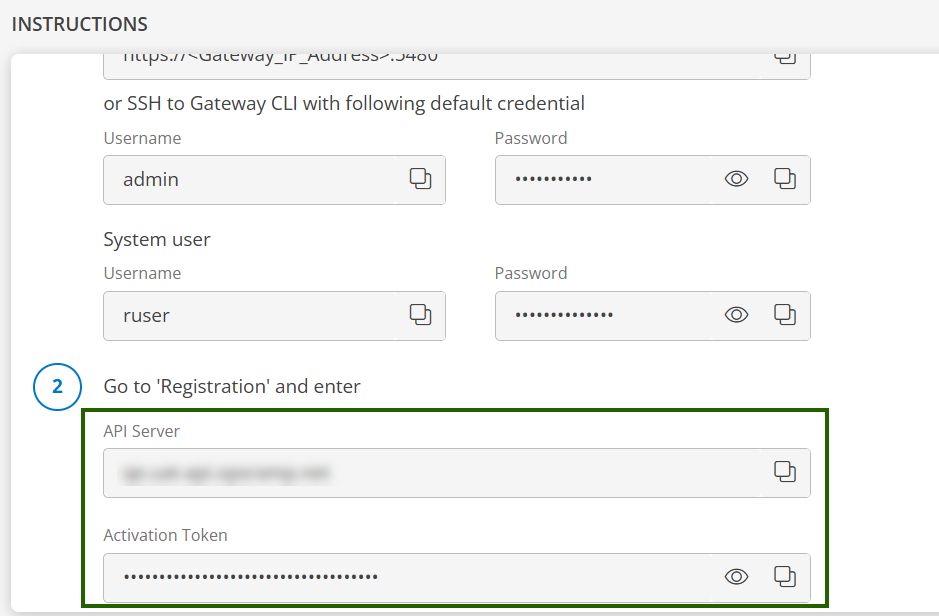
- Navigate to the Registration tab.
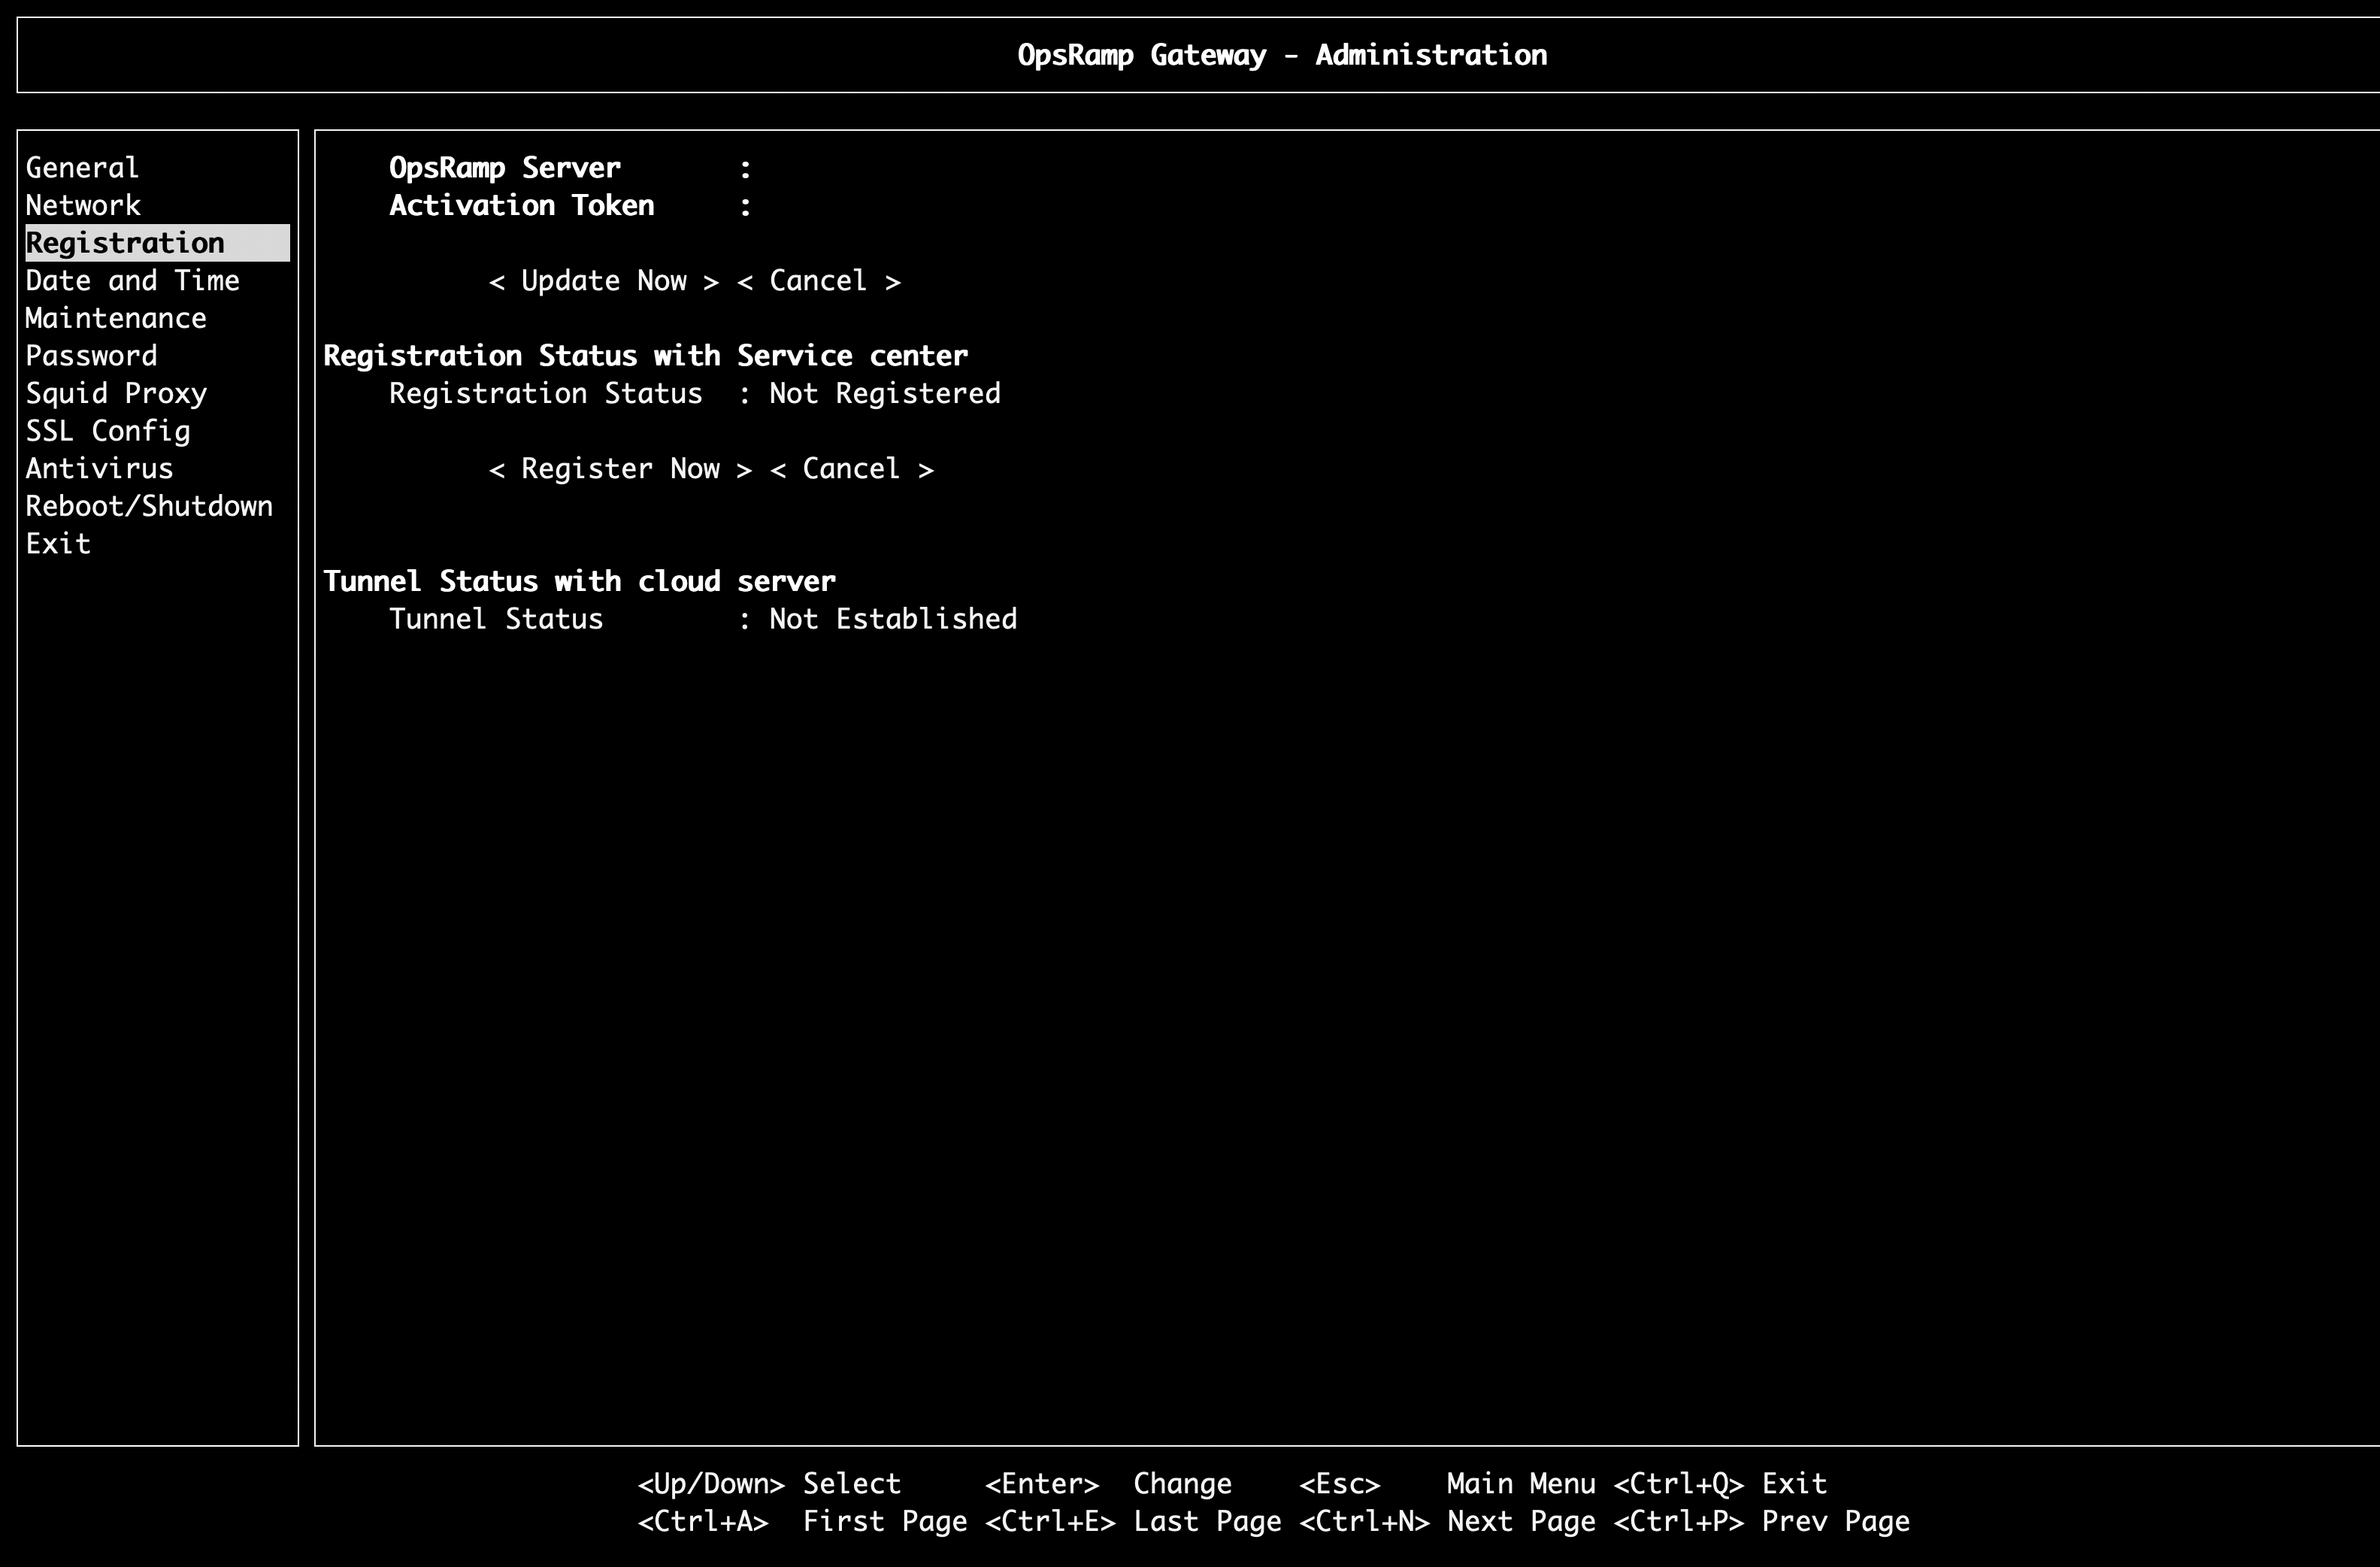
- Enter the Activation Key and OpsRamp Server details on the registration screen.
- To obtain the Activation Key and OpsRamp Server details, navigate to Setup > Account > Collector Profiles in the OpsRamp portal.
Step 5: Verify Registration
- Registration may take a few minutes.
- Navigate to Setup > Account > Collector Profiles to confirm the gateway is connected.
×![]()