Overview
This section provides step-by-step instructions to deploy the OpsRamp Gateway VM using an OVA template on supported platforms.
The supported environments are:
- VMware vSphere / ESXi (on-premises)
- HPE VM Essentials (VME)
Prerequisites
Before deploying the Gateway VM, ensure the following prerequisites are met:
- OpsRamp Gateway OVA file downloaded from the OpsRamp portal.
- Access permissions to deploy resources in the VMware vSphere/Esxi and HPE VME environment.
- VM network connectivity to OpsRamp Cloud endpoints.
- Valid license and credentials to register the Gateway.
- Review the server requirements before creating a VM.
Installation Steps
Below are step-by-step instructions to deploy the OpsRamp Gateway in various environments:
Step 1. Connect to VMware ESXi Server
- Open vSphere Client and log in to your ESXi host.
Step 2. Upload the Gateway OVA to Datastore
Before creating the VM, upload the Gateway OVA to the VMware datastore:
- In the vSphere Client, navigate to Storage.
- Select your target datastore.
- Click Datastore Browser.
- Click Upload > Upload File.
- Browse and select the Gateway OVA file downloaded from the OpsRamp portal.
- Wait for the upload to complete successfully.
Info
Make a note of the directory path where the OVA is uploaded you’ll need it in a later step when attaching the OVA to the VM.Step 3. Deploy the OVA Template
- In vSphere Client, click File > Deploy OVF Template.
- Click Browse and navigate to the datastore where you uploaded the OVA file.
- Select the OVA file and click Open.
Step 4. Review OVA Template Details
- Verify details on the OVA Template Details screen such as VM size and configuration.
- Click Next.
Step 5. Name and Location
- Enter a unique name for the Gateway VM (e.g.,
OpsRamp-Gateway-01). - Select the appropriate datacenter or folder location.
- Click Next.
Step 6. Select Resource Pool
- Select the resource pool (e.g., VG) where the VM will run.
- Click Next.
Step 7. Select Storage
- Select the datastore for VM files.
- Ensure there is enough free space.
- Click Next.
Step 8. Configure Disk Format
- Confirm datastore and available space.
- Enable Thick Provision Lazy Zeroed for better disk performance.
- Click Next.
Step 9. Network Mapping
- Select the network(s) that the Gateway VM will connect to.
- Click Next.
Step 10. Review Deployment Settings
- Review all selected configuration details, including VM name, datastore, disk format, and network mapping.
- Confirm that all settings are correct before proceeding.
- Click Finish to begin deploying the OVA.
Step 11. Monitor OVA Deployment
- Wait for the OVA deployment task to complete.
- You can monitor the progress in the Recent Tasks pane of the vSphere Client.
- Ensure the deployment completes successfully without errors.
Step 12. Power On the Gateway VM
Once the OVA deployment is complete, power on the virtual machine. In the vSphere Client:
- Right-click the Gateway VM.
- Select Power > Power On. This starts the Gateway VM and initiates the boot process.
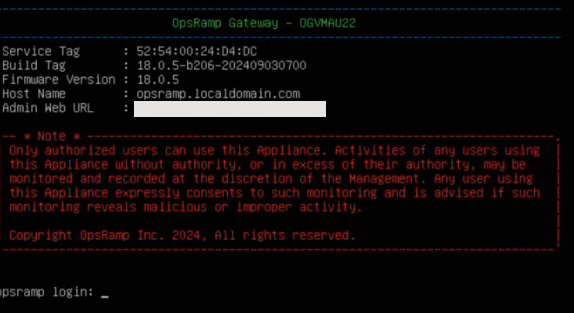
Step 13. Access the VM Console
Open the VM console to verify the boot process and perform initial configuration if required.
- Select the Gateway VM.
- Click Open Console. Use this console to monitor startup messages and access the VM login prompt.
Step 14. Configure Network Settings
Inside the Gateway VM, configure the required network settings.
- Assign a static IP address based on your network design
- Configure subnet mask, gateway, and DNS as required This ensures the Gateway is reachable from the network.
Step 15. Verify Network Connectivity
Confirm that the Gateway VM has proper network connectivity.
- Verify the assigned IP address
- Test connectivity (for example, ping the default gateway or OpsRamp endpoints)
Step 1: Verify/Enable Required HPE VME Cloud Settings
You need to ensure that the following cloud settings are enabled for a smooth installation of OpsRamp NextGen gateway.
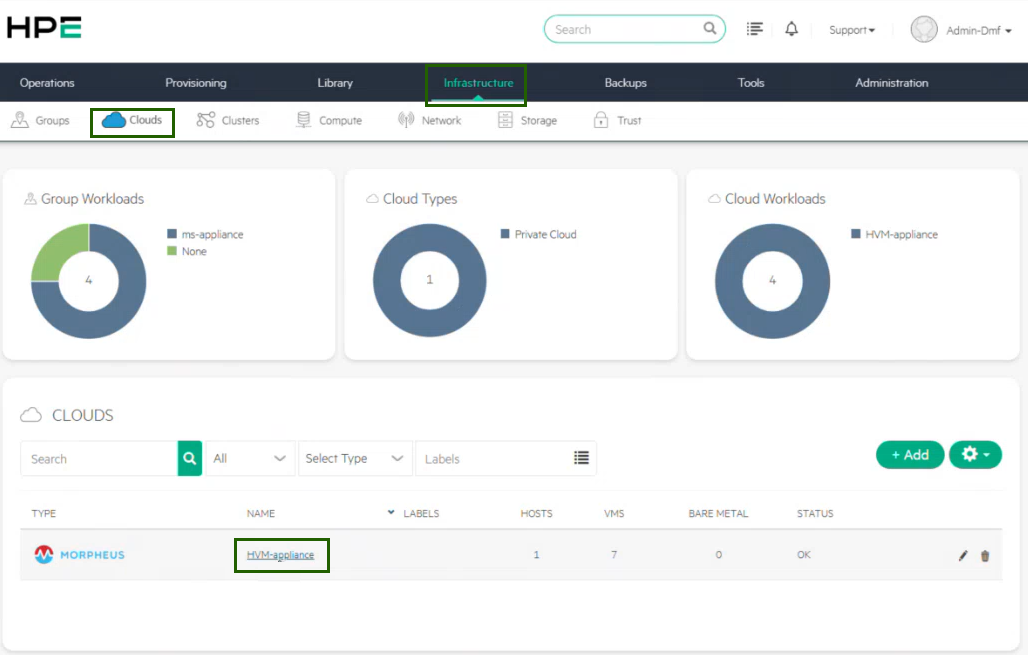
- Log in to HPE VME.
- Navigate to Infrastructure > Clouds. In the Clouds type, you will see the cloud configuration entry (here, HVM-appliance).
- Click HVM-appliance.
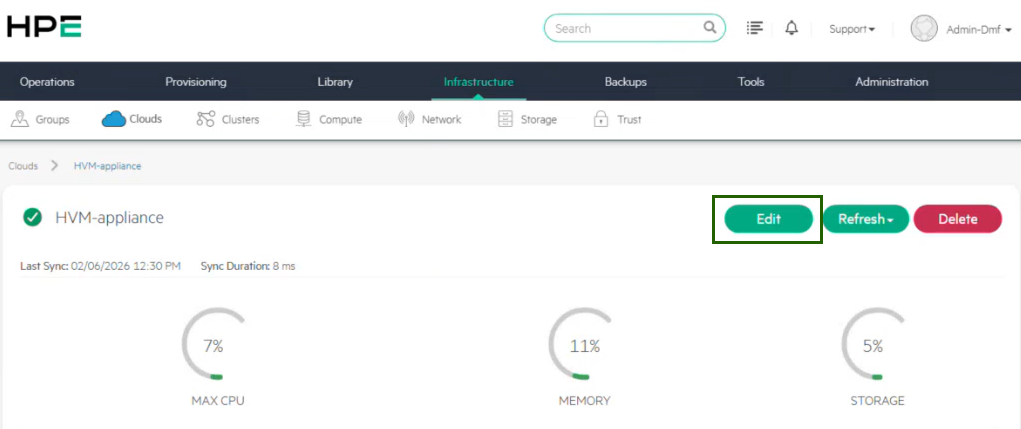
Click Edit.
In the EDIT CLOUD page, ensure all the required options are enabled (as per your VME environment), listed in the table below.
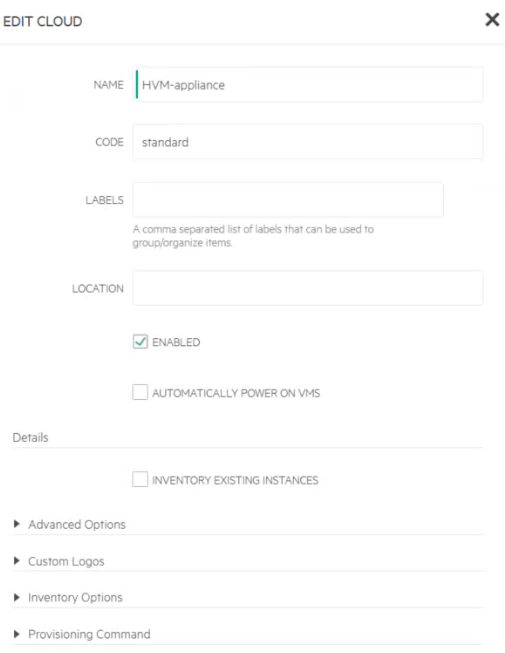
| Field | Select |
|---|---|
| Location | Enabled |
| Advanced Options |
|
Step 2: Download the NextGen Gateway OVA
To download the NextGen Gateway OVA from OpsRamp Portal, follow the steps below:
In the OpsRamp portal, select your client from All Clients.
Navigate to Setup > Account > Collector Profile.
On the Collector Profiles page, click + ADD.

On the configuration page, enter the following details:
- Profile Name: Provide a name for the profile you are creating.
- Profile Type: By default, the Standard profile type is selected.
- Description: Add a short description for the profile. (Optional)
- Gateway Collector (NextGen): Select the VIRTUAL APPLIANCE (OVA) tile. You can also choose the desired Gateway version from the available options from the dropdown.
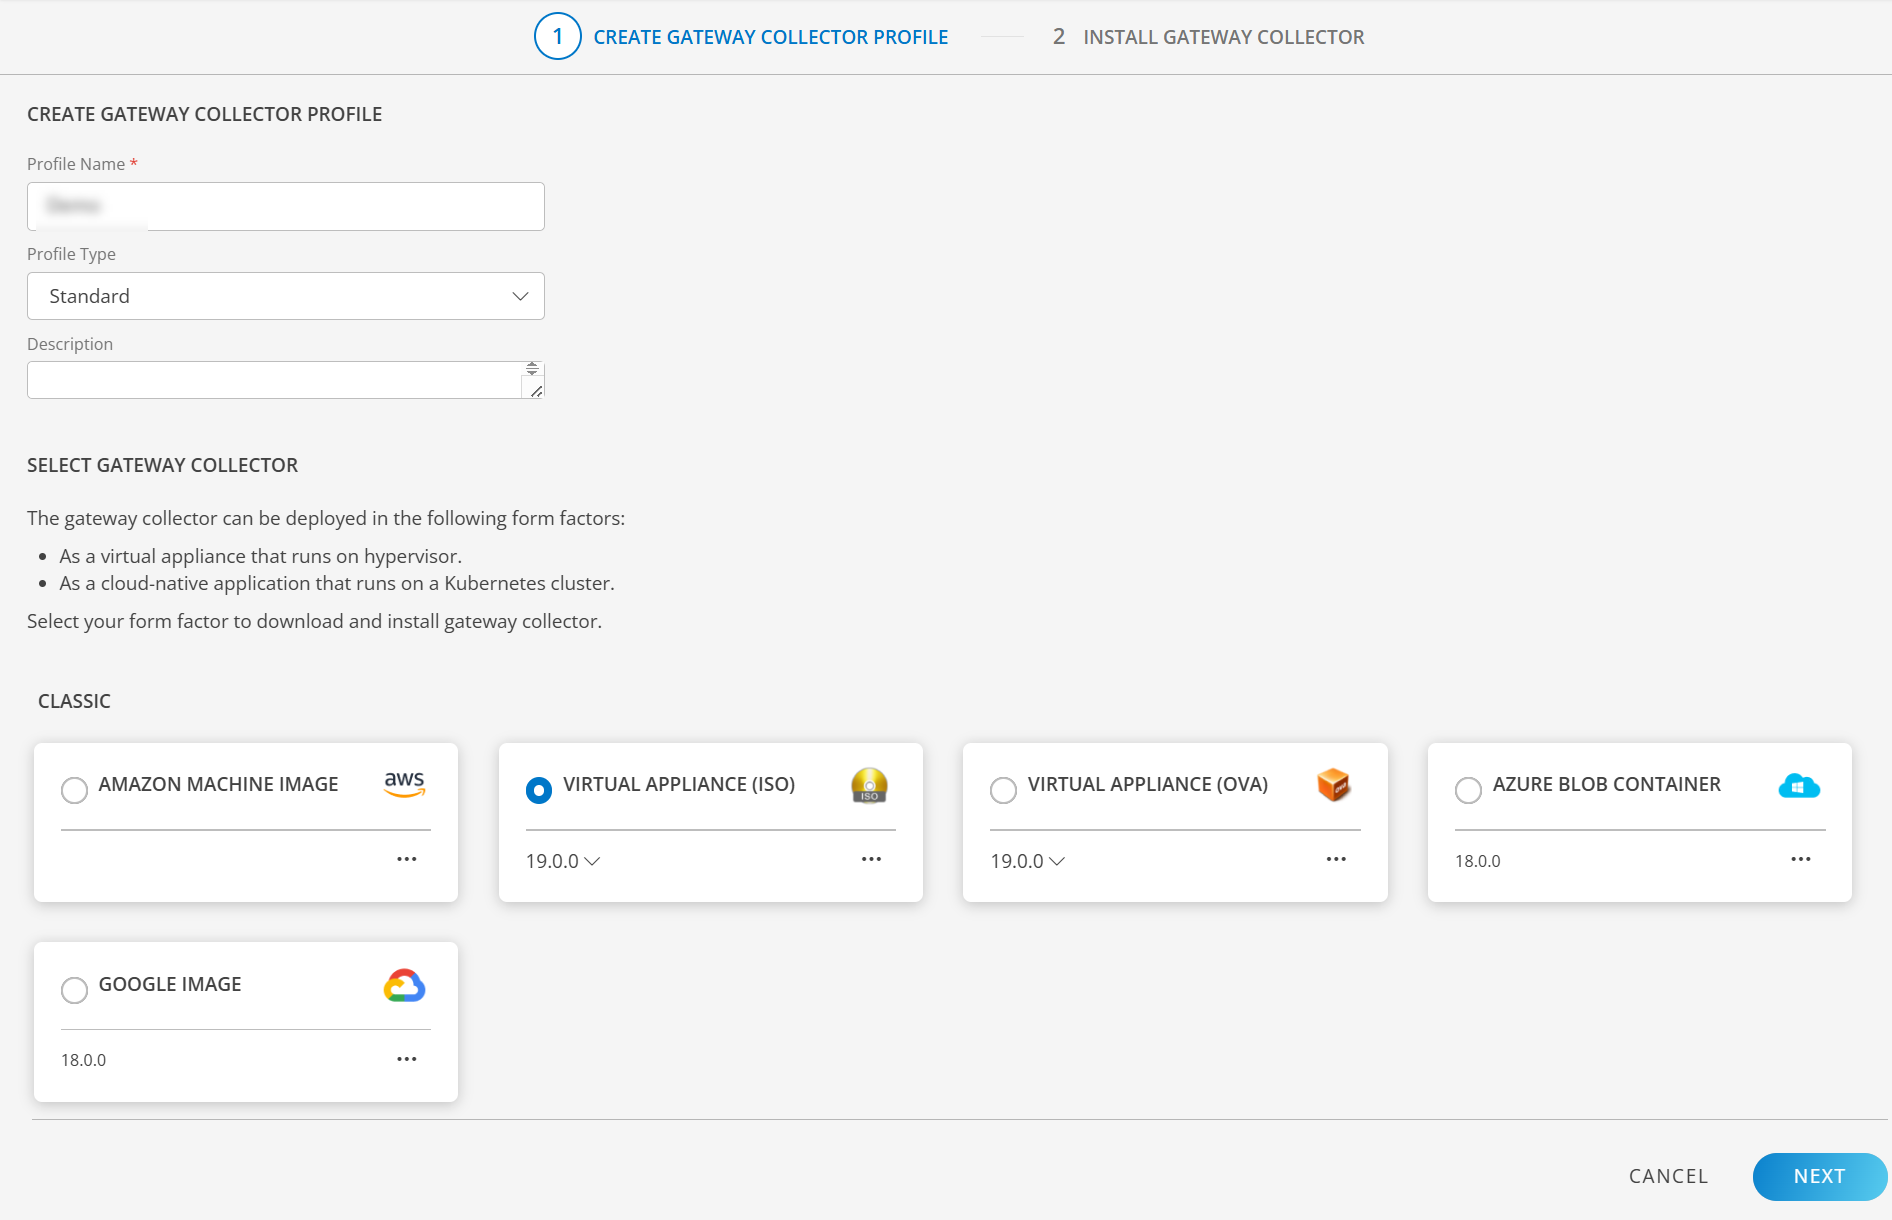
- Click NEXT.
- Download the NextGen Gateway OVA by clicking on the VIRTUAL APPLIANCE (OVA) tile.

- Once the OVA is downloaded, you can proceed to the installation Step.
Step 3: Create OVA image in the VME Library
Navigate to Library > Virtual Images.
The Virtual Images page displays multiple image types.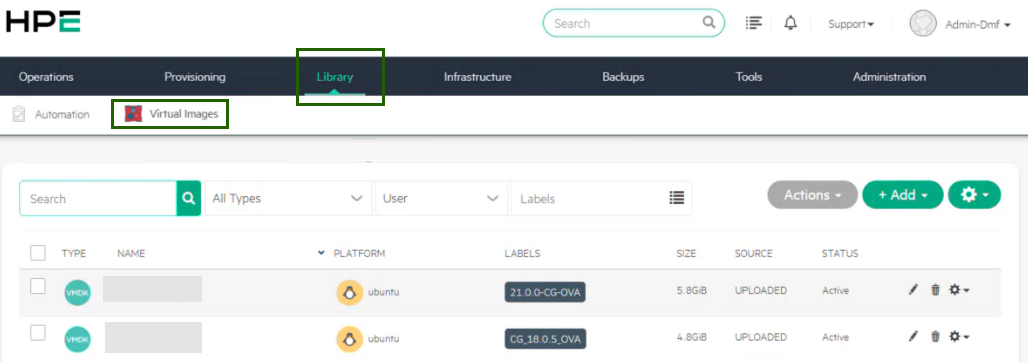
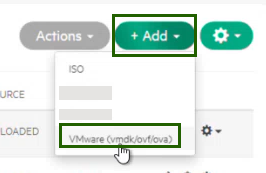
Select +Add > VMware (vmdf/ovf/ova).
In the UPLOAD VIRTUAL IMAGE page, enter the following details:
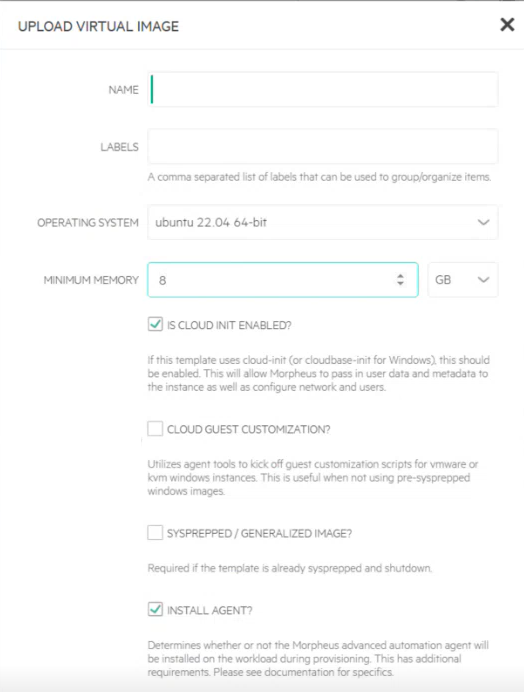
- Name: Name for OVA image.
- Labels: A short label/description.
- Operating System: Ubuntu 22.04 (64-bit)
- Minimum memory: 8 GB
- Select IS CLOUD INIT AVAILABLE? and INSTALL AGENT?
- Select File for Create Image type.
- Click Add File.
- Upload the downloaded Gateway OVA file.
- In the Advanced drop-down, select VIRTIO DRIVERS LOADED? and VM TOOLS INSTALLED?.
- Click Save Changes.
You have now created the OVA image, which is available in the Library list.
Step 4: Deploy (spin up) the Gateway VM (Instance)
In VME environment, navigate to Provisioning > Instances.
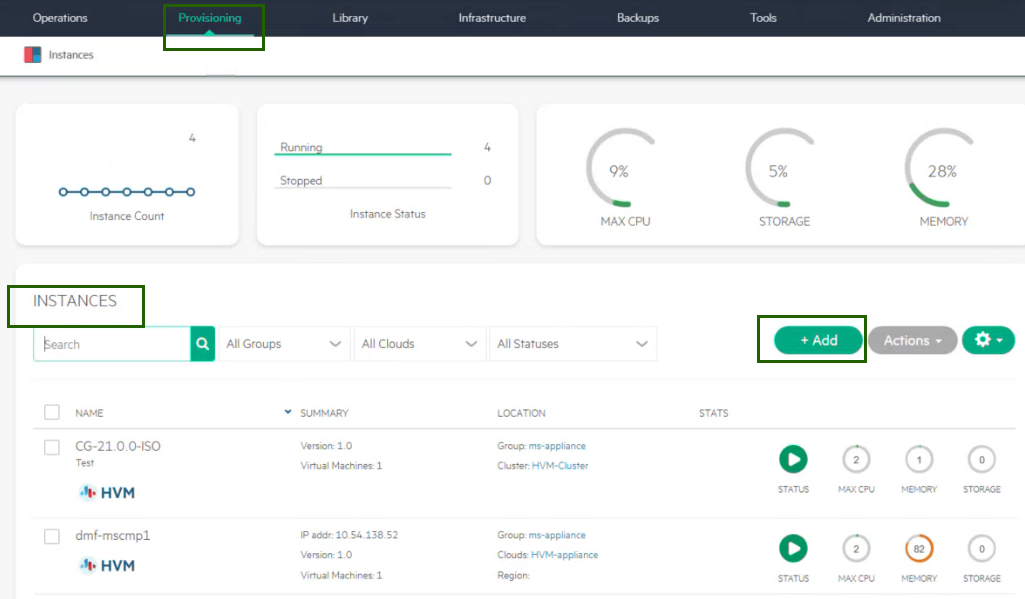
Click Add. The CREATE INSTANCE page is displayed.
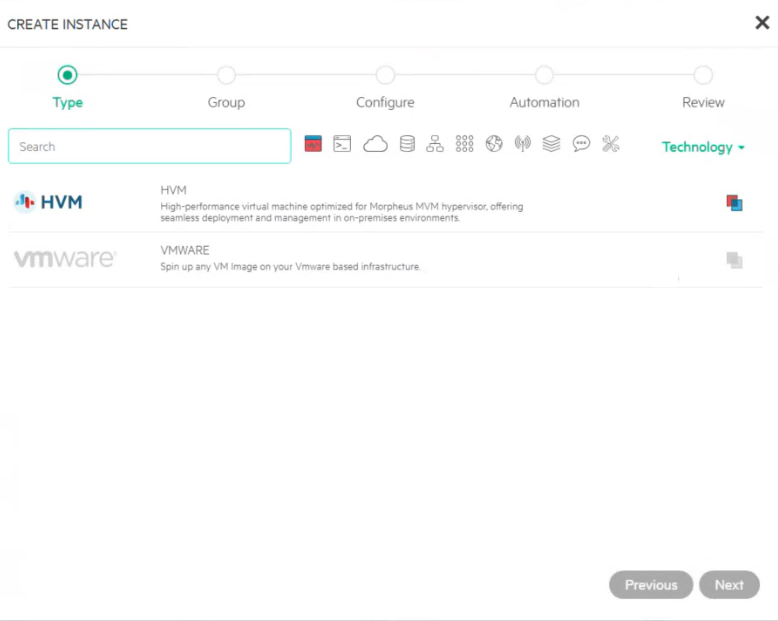
Select the HPE VME / HVM option.
Enter instance name in the CREATE INSTANCE page.
Click Next
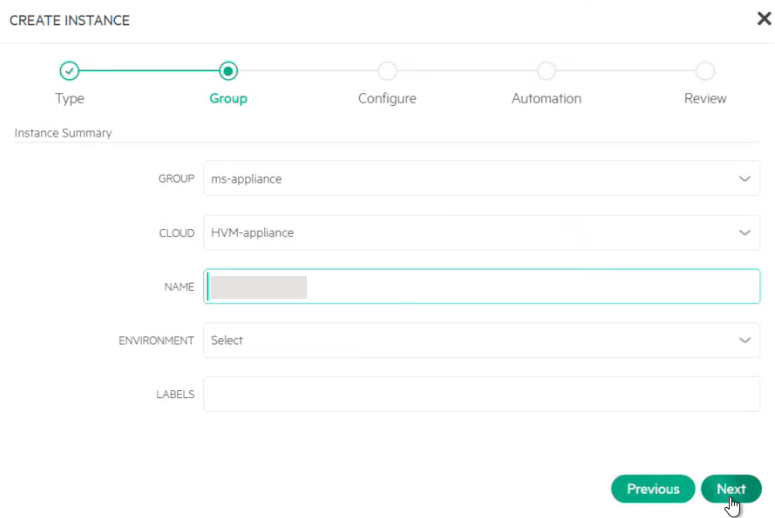
Enter the following configurations:
- Plan: 4 CPU / 16 GB Memory
- Resource Pool: HVM Cluster
- Volumes: root/60 GB/Standard
- Networks: Management
- Image: Select the OVA image you just created.
- Select Host from the drop-down.
- In the Advanced Options drop-down, select:
QEMU ARGUMENTS - ATTACH VIRITO DRIVERS
Click Next. You can skip the automation configuration options and click Next.
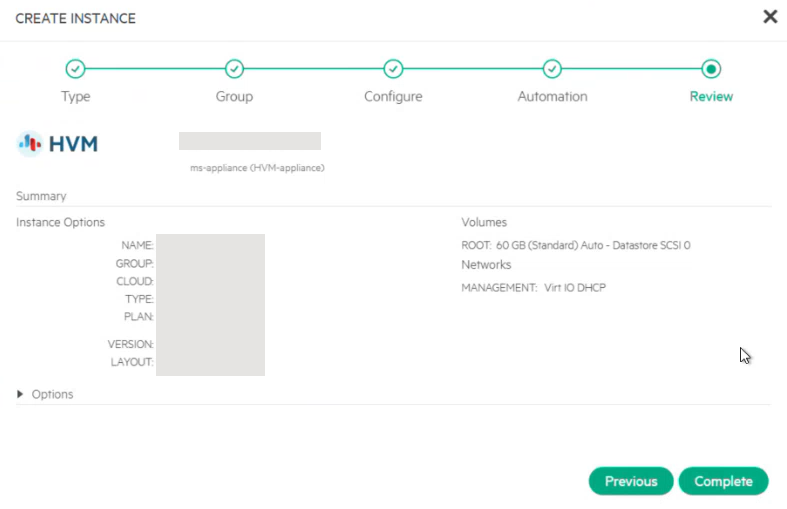
Review the complete configuration and then click Complete.
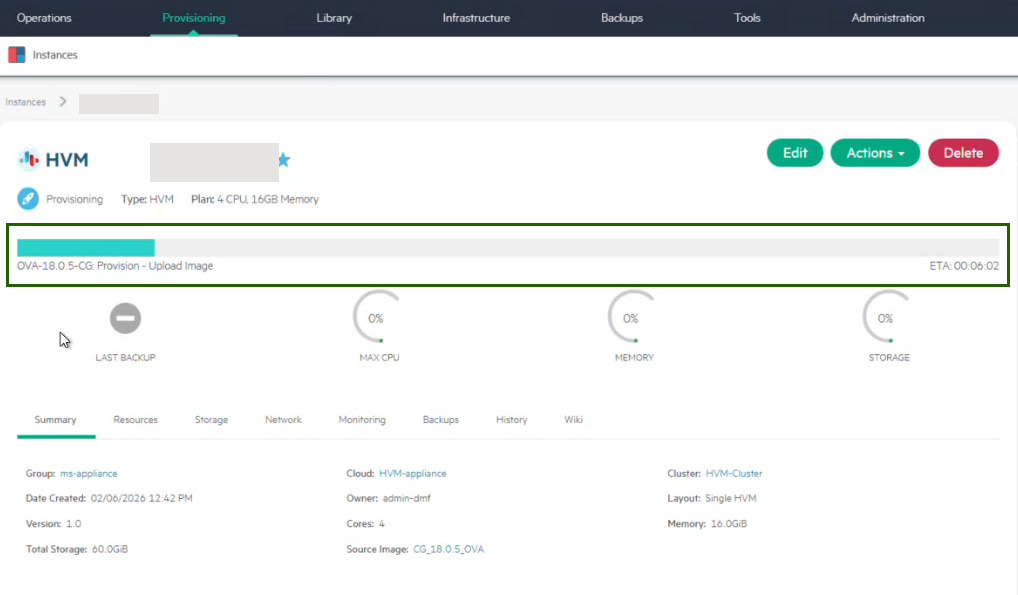
Step 5: Monitor Deployment and Confirm VM Status
After submission, the VM will show as Creating in the Library list. Click the VM and you can see the progress. When complete, status will show as green.
Step 6: Get the Gateway IP address (for Registration)
- In Instances, click the instance name.
- From Actions, select Open Console.
- Locate the IP address shown in the console.
4. Use this IP for the standard OpsRamp gateway registration flow.
Step 7: Register the Gateway
Refer to the Install Gateway Using OpsRamp Bootstrap Tool page for step-by-step instructions for completing the Gateway installation.