This page provides step-by-step instructions for deploying the OpsRamp Windows Gateway using an application installer file.
Step 1: Download the Windows Gateway Installer File
To download the Windows Gateway installer file, follow the steps below:
- In the OpsRamp portal, select your client from All Clients.
- Navigate to Setup > Account > Collector Profile.
- On the Collector Profiles page, click + ADD.

- On the Add Gateway Collector Profile page, enter the following details:
- Profile Name: Provide a name for the profile you are creating.
- Profile Type: Select Standard.
- Description (Optional): Add a short description for the profile.
- Gateway Collector: Select the INSTALLER FOR WINDOWS OS tile.
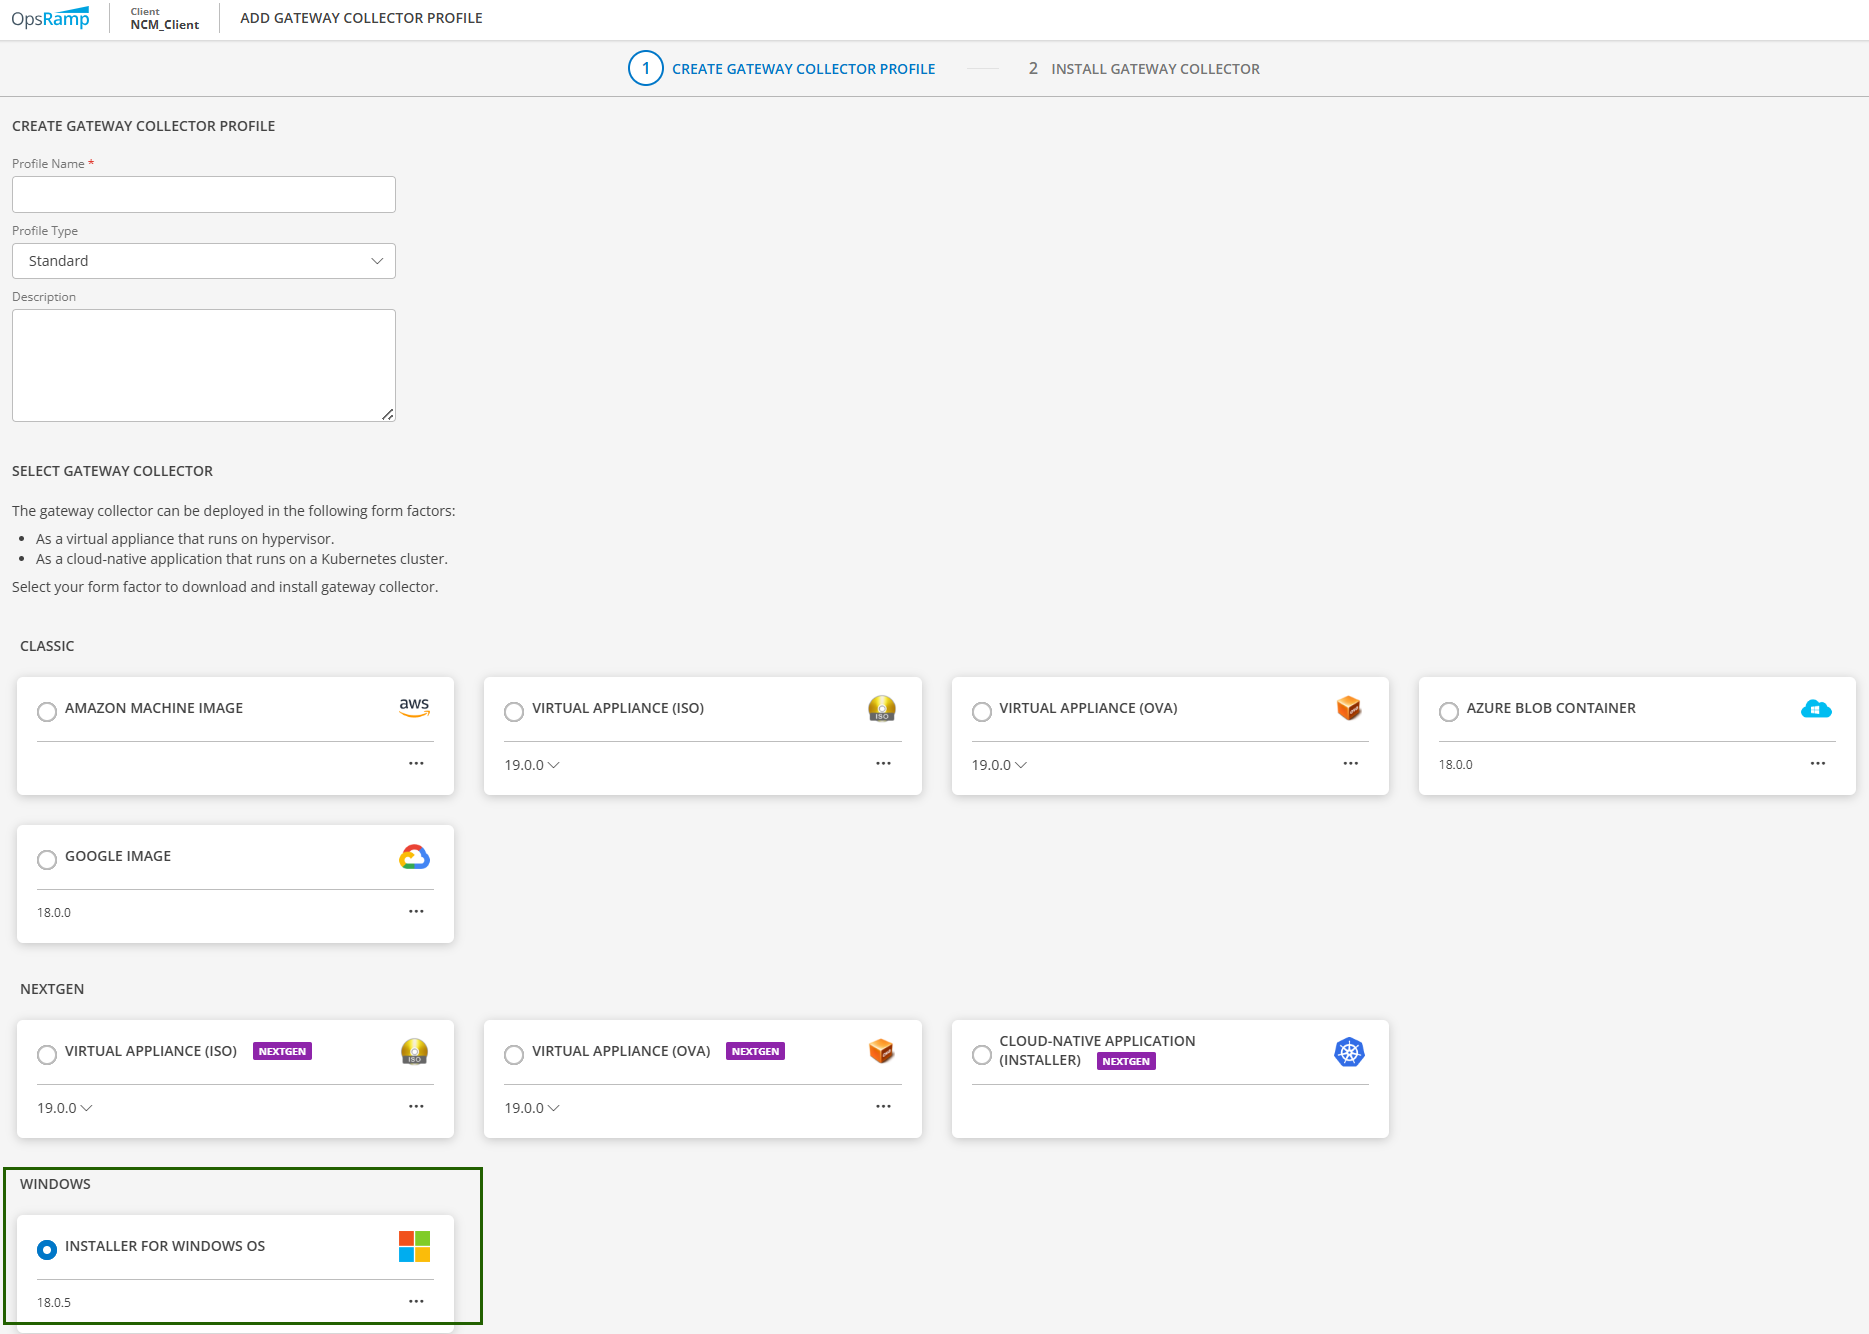
- Click NEXT.
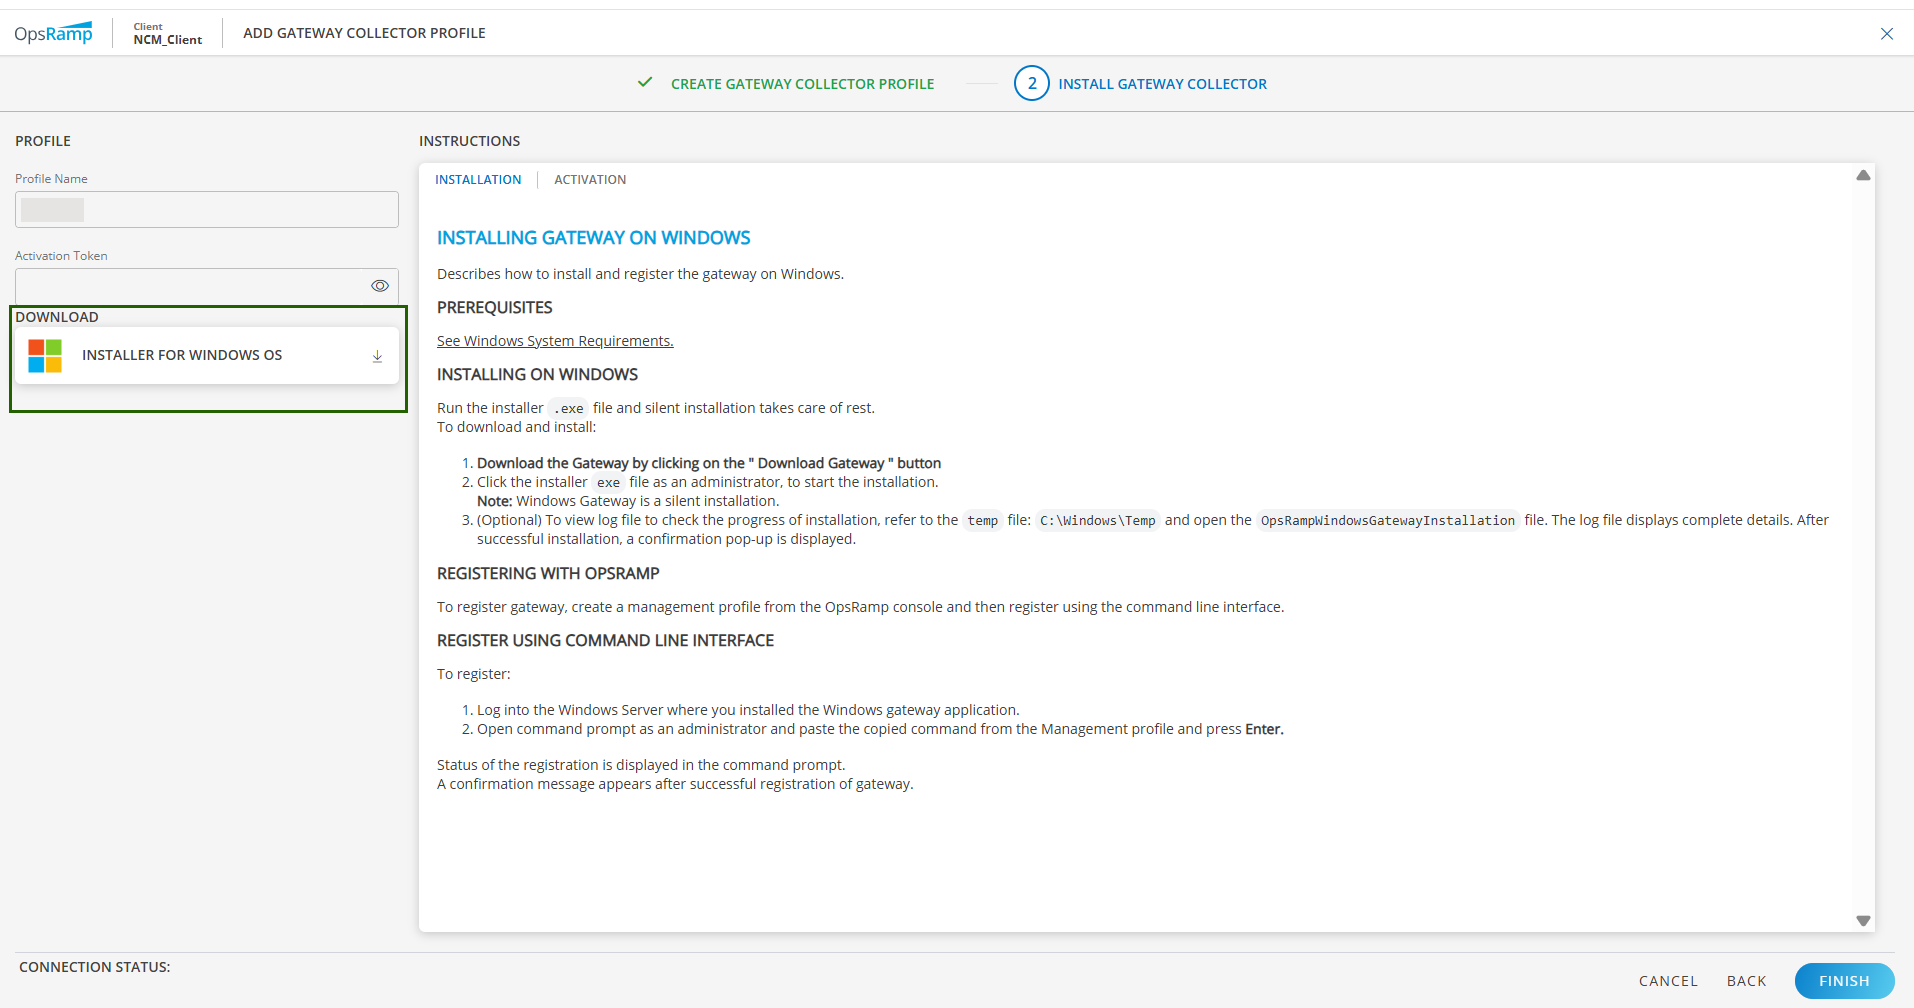
- Click INSTALLER FOR WINDOWS OS in the left pane to download.
Once the installer file is successfully downloaded, you can proceed with the installation process.
Step 2: Install the Gateway
- Run the installer file as an Administrator to start the installation. (Windows Gateway is a silent installation.)
- To check the progress of the installation, go to the C:\Windows\Temp folder and open the
OpsRampWindowsGatewayInstallationlog file. The log file includes installation details. - A confirmation message displays when the installation is complete.
Step 3: Register the Gateway
You can register and activate Windows Gateway with one of the following options:
- Direct connection
- Proxy server
Click the ACTIVATION tab on the Add Gateway Collector Profile page and follow the steps below.
Direct connection
Register Windows Gateway directly.
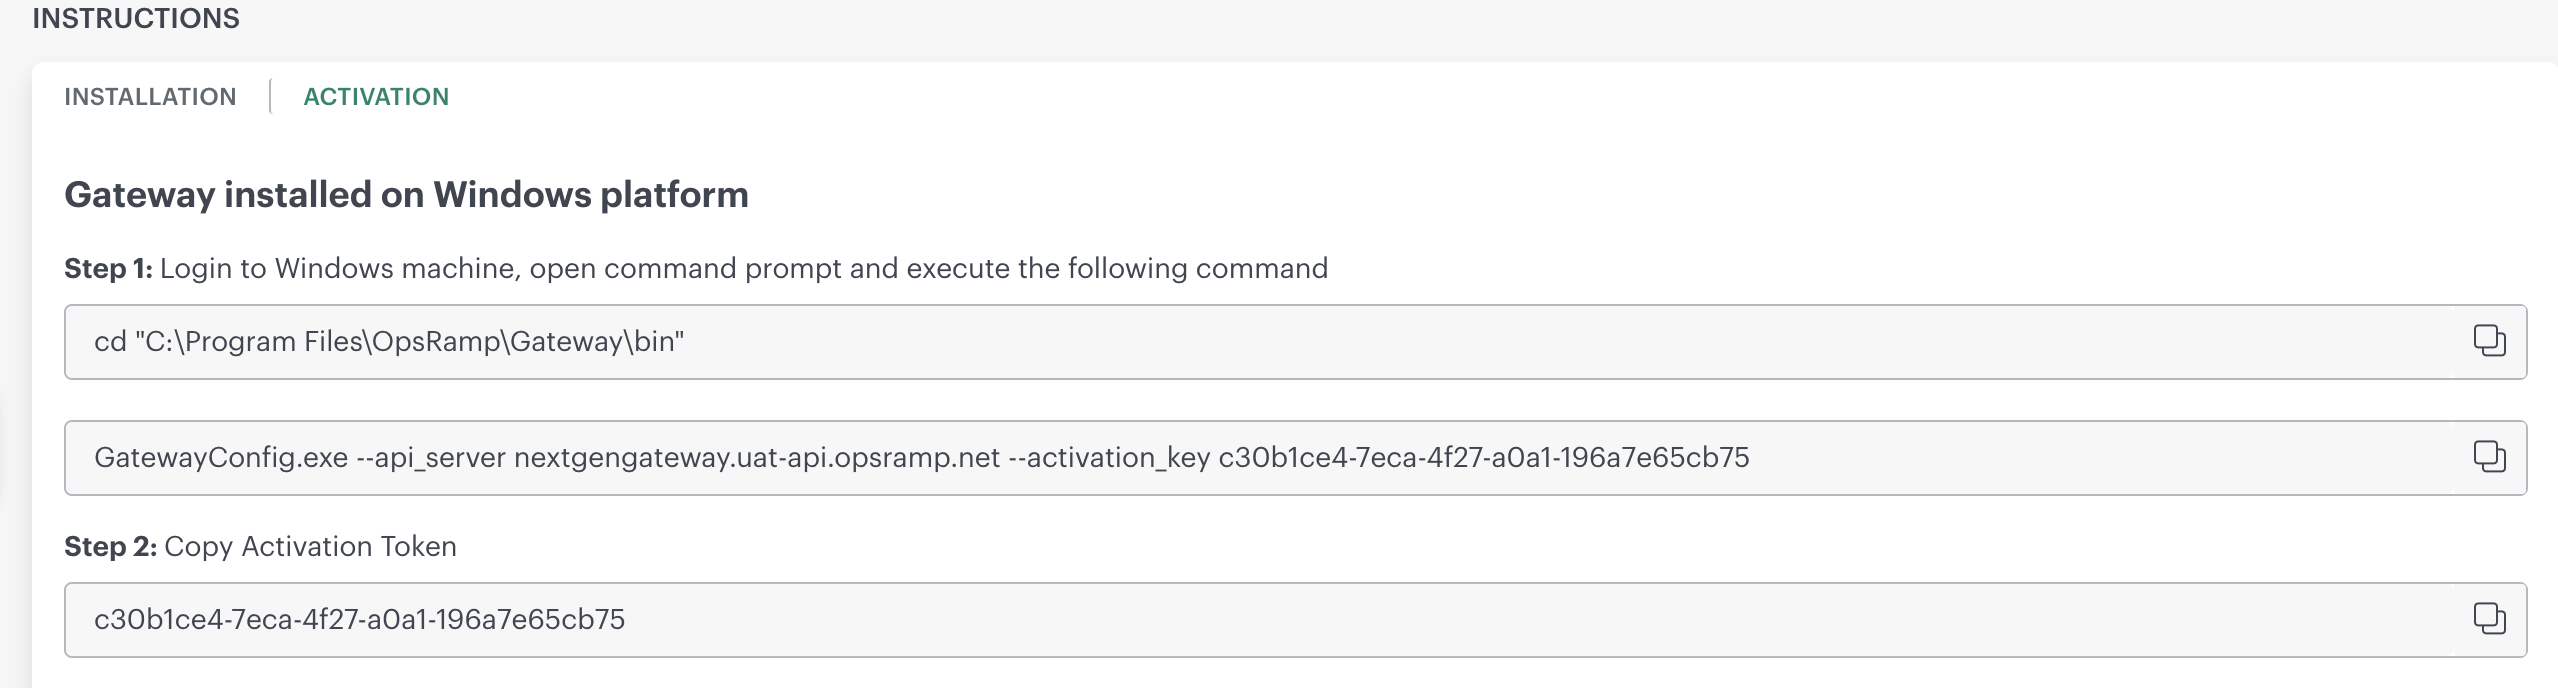
- Open the command prompt as an administrator.
- Paste the command copied from the Step 1 under the option Gateway Installed on Windows platform and press Enter.
The status of the registration is displayed in the command prompt. Example:
cd "C:\Program Files\OpsRamp\Gateway\bin"
GatewayConfig.exe --api_server ncm.uat-api.opsramp.net --activation_key cf4f58fa-efbc-4f1c-a168-123976ee1cf5- Click Finish. The status of the Gateway changes to CONNECTED.
Proxy connection
You can register Windows Gateway using a proxy server in the following ways:
- Register without authentication
- Register with Authentication
Register the Windows gateway without authentication:
- Open the command prompt as an administrator.
- Paste the command copied from the Step 1 under the option Gateway Installed on Windows platform and add the parameters,
proxy_ipandproxy_port. - Press Enter to run the command.
The status of the registration is displayed in the command prompt. Example:
   cd "C:\Program Files\OpsRamp\Gateway\bin"
    GatewayConfig.exe --api_server  *.api.opsramp.net --activation_key 8120d33a-b301-482d-841c-1f562f3abcde --proxy_ip 192.168.1.2 --proxy_port  3128
Register the Windows Gateway with authentication:
- Open the command prompt as an administrator.
- Paste the command copied from the Step 1 under the option Gateway Installed on Windows platform and add the parameters,
proxy_ip,proxy_port,proxy_username, andproxy_password. - Press Enter to run the command. The status of the registration is displayed in the command prompt.
Example:
    cd "C:\Program Files\OpsRamp\Gateway\bin"
    GatewayConfig.exe --api_server  *.api.opsramp.net --activation_key 8120d33a-b301-482d-841c-1f562f3abcde --proxy_ip 192.168.1.1 --proxy_port  3128 --proxy_username admin --proxy_password Pass@1234
Note
Supported Windows OS installation language for Windows Gateway: EnglishVerify Gateway Registration
Once the the registration steps are completed, you can verify the gateway registration sucess. In the Collector Profile page, the status of the successfully registeretd gateway displayed CONNECTED.

Guidelines and Limitations
For important guidelines and known limitations when working with Windows Gateway, refer to the following resources: